Recap of Apple Developers Community #7 meetup
Went to Apple Developers Community #7 today. The talks were about marketing iOS apps. Two people effectively presented — a representative from Nevosoft, who seem to crank out games on a conveyor belt, and one indie developer.
It was pretty boring. What they said could have been said much faster. The woman from Nevosoft was asked silly questions for ages. As always, there were a couple of know-it-alls in the room itching to demonstrate how clever they were.
Not that there were any revelations, but a lot of things, until someone says them out loud, don’t feel important and don’t stay in your focus.
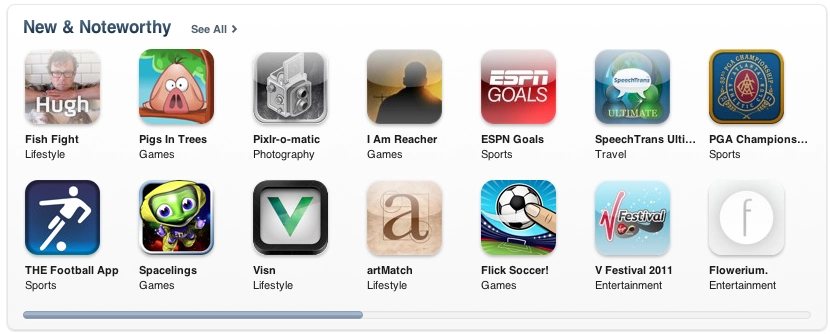
Key takeaways. The app icon is very important. Insanely important (I’m not being sarcastic) — the first thing the user sees is the icon in the listing. It should be bright; the advice was to take a screenshot of the App Store, drop your icon into it, and check whether it stands out and catches the eye. Plus look at how it looks on the iPhone home screen among other apps — the user should be able to spot it visually quickly.

The second thing the user sees is the app screenshots. How they look matters too — they need attention. If they don’t hook the user, they won’t install your app even if it’s free (from my own experience — agreed). The view was that doing plain app screenshots isn’t always worth it — they look much more appealing if presented somehow, e.g. composited inside an iPhone mock-up. Apple doesn’t require screenshots to be strictly app screenshots, and many people exploit this, building entire collages.


On launch day you get a head start by appearing in the «New» list within your category. So later sales/downloads largely depend on the first day.
Then they talked about the description and choosing keywords. People usually try to pick keywords cleverly so that fewer competitors show up for them and you get noticed. It’s a double-edged sword — you can find a word for which you’re alone, but no one would think to type it. The indie developer claimed that if a keyword appears both in your app name and in the keyword list, you rank higher. That’s his personal experience.
Worth investing in the description too — if people read it at all, they read at most the first lines. Walls of text discourage further reading (again, agreed from experience).
Apple requires apps to have a website / web page. It’s a mandatory condition so users have a way to give feedback to the developer. And again — to a degree it generates user flow.
Then they discussed various ad networks, click-throughs, and the pros and cons of Full and Lite versions — also a double-edged sword. On one hand, Lite drives traffic to the Full version. On the other, promoting two apps is harder than one.
The indie developer said you have to polish everything — do every possible localisation (he commissioned translations into European and Asian languages), and each new localisation brought him a percentage of new users. Work properly on press releases, especially in other languages, even outsourcing them to specialists for proofreading.
And, most importantly — the app shouldn’t be crap, but that one’s obvious.
Posting to Twitter via PHP
Long meant to share my modest set of functions for posting tweets to Twitter. Maybe useful to someone — none of it came to me right away, especially the signature generation. Plus this is my attempt to lock into my head what I’ve learnt and coded. The best way to do that, I think, is to try to explain it to someone else :) Description and code below the cut.
There are quite a few scripts online for posting messages to Twitter, but when I had to set up automatic tweeting (for work) — none of them quite did it for me, either because of unnecessary complexity or just outright spaghetti code. On top of that, while learning the Twitter API, writing my own bicycle was useful in itself.
Communication with the Twitter API happens via OAuth authorisation (specifically OAuth, not OAuth 2.0 — though maybe 2.0 is fine by now). Requests have to be assembled in a particular way and accompanied by a specially crafted signature.
First, register an app at dev.twitter.com; you’ll get a Consumer key and Consumer secret. They’ll also issue you personally an Access token and Access token secret, so the app can post on behalf of your user right away.
Let’s define the access settings for the script:
# settings
$oauth_token = 'Your access token';
$oauth_token_secret = 'Your access token secret';
$oauth_consumer_key = 'Your consumer key';
$oauth_consumer_secret = 'Your consumer secret';
$url = 'http://api.twitter.com/1/statuses/update.json';
In my case posting a tweet consists of 4 steps:
- Building the tweet text (a 140-character string with text and possibly a link).
- Building the request parameters and signature.
- Building the request headers.
- Sending the request.
The set itself consists of 3 functions. The main function is postTweet(). It takes the tweet text as a parameter — pre-prepared, i.e. already 140 characters long. Usually I prepare it somewhere outside of this function. Inside postTweet, the other 2 functions are called — the signature builder (makeSignature) and the actual function that posts the tweet to Twitter (postTweet).
Let’s go in order. The signature function makeSignature:
/**
* Builds a signature for the data
* @global array $oauth_consumer_secret
* @global string $oauth_token_secret
* @param string $url
* @param Array $data
* @return string
*/
function makeSignature( $url, $data ){
global $oauth_consumer_secret, $oauth_token_secret;
$txt = 'POST&' . rawurlencode( $url ) . '&';
$tmp = array();
foreach( $data as $key => $value )
$tmp[] = rawurlencode( $key ) . "%3D" . rawurlencode( $value );
$txt .= implode( "%26", $tmp );
$key = $oauth_consumer_secret . '&' . $oauth_token_secret ;
return base64_encode( hash_hmac( 'sha1', $txt, $key, true ) ) ;
}
As input, the function takes the data needed to build the signature ($data) and the $url the request will go to. In short — we build a string. First we write POST in it, indicating we’ll use a POST request. The input parameters are assembled into the right form (alphabetical order matters), then this whole thing is encoded with the HMAC-SHA1 algorithm; the encoding key is:
$key = $oauth_consumer_secret . '&' . $oauth_token_secret;
The encoded string is our signature. This deceptively simple function ate up a fair bit of time and nerves =(
Now the main function — postTweet:
/**
* Posts a message to Twitter
* @global string $url
* @param string $oauth_consumer_key
* @param string $oauth_token
* @param string $statusText
*/
function postTweet( $statusText ){
global $url, $oauth_consumer_key, $oauth_token;
$nonce = md5( microtime() . mt_rand() );
$time = time();
$date = date( 'r' );
$data = array(
'oauth_consumer_key' => $oauth_consumer_key,
'oauth_nonce' => $nonce,
'oauth_signature_method' => "HMAC-SHA1",
'oauth_timestamp' => $time,
'oauth_token' => $oauth_token,
'oauth_version' => '1.0',
'status' => rawurlencode( $statusText )
);
$signature = makeSignature( $url, $data );
$data['status'] = $statusText;
$data['oauth_signature'] = $signature;
$header = 'OAuth oauth_nonce="' . rawurlencode( $nonce ) . '", ';
$header .= 'oauth_signature_method="HMAC-SHA1", ';
$header .= 'oauth_timestamp="' . rawurlencode( $time ) . '", ';
$header .= 'oauth_consumer_key="' . rawurlencode( $oauth_consumer_key ) . '", ';
$header .= 'oauth_token="' . rawurlencode( $oauth_token ) . '", ';
$header .= 'oauth_signature="' . rawurlencode( $signature ) . '", ';
$header .= 'oauth_version="1.0"';
return curlPostTweet( $url, $header, $date, $data );
}
This function takes the already-prepared tweet text (140 characters), and the $data array is filled with request data. Then the request signature is built from the same data (calling makeSignature, described above). The signature is added to the data. The HTTP request headers are built — basically the literal string "OAuth" followed by the same $data values. All of that is then passed to curlPostTweet(), which actually posts to Twitter. It does so via CURL.
function curlPostTweet( $url, $header, $date, $postData ){
$ci = curl_init();
curl_setopt( $ci, CURLOPT_URL, $url );
curl_setopt( $ci, CURLOPT_RETURNTRANSFER, true );
curl_setopt( $ci, CURLOPT_HTTPHEADER, array( 'Authorization', $header, 'Date: ' . $date ) );
curl_setopt( $ci, CURLOPT_POST, 1 );
curl_setopt( $ci, CURLOPT_POSTFIELDS, http_build_query( $postData ) );
return curl_exec( $ci );
}
I don’t think this needs further explanation. You can also inspect the result the request returns. If something’s wrong, it’ll contain an error and its description. Otherwise the request returns the freshly posted tweet and info about it. And in your timeline, the freshly posted tweet will proudly show as its client the name of the app you registered.
As a bonus, I’m attaching a function for getting a shortened link. Here it uses the clck.ru link shortener by @bobuk
function curlGetShortLink( $url ){
$link = "http://clck.ru/--?url=" . $url;
$ci = curl_init();
curl_setopt( $ci, CURLOPT_URL, $link );
curl_setopt( $ci, CURLOPT_RETURNTRANSFER, true );
while ( true ) {
$returned = curl_exec( $ci );
$status = curl_getinfo( $ci, CURLINFO_HTTP_CODE );
# if the service is unavailable or rate-limited:
if ( $status == "200" ) {
break;
}
sleep( 2 );
}
return $returned;
}
These functions currently power 4 bots, which have been doing their job for several months now. If you’re curious — @funkysouls and @rutracker_ios, which parse RSS and post to Twitter, plus a couple of our work bots.
Thanks to @stay_positive for the timely help — and some of the code here is his. Oh and
PUT problems after upgrading CouchDB to 1.1.0
Today we upgraded CouchDB on the production server to 1.1.0. Ran into a problem — PUT requests didn’t work, returning a strange error:
[error] => unknown_error
[reason] => function_clause
I.e. we couldn’t update a single document in the database, while POST requests for creating new documents worked just fine.
It turned out that when upgrading CouchDB from an older version to 1.1.0 there are two versions of some module left in the system (it might affect several modules) — the old one and the new one. These two versions conflict with each other.
The fix was simple, although a bit weird. You need to find where the *.beam files are stored on the system (in our case it’s /opt/couchdb), delete them (if you’re nervous, you can move them aside), then go back to the CouchDB source folder and run again:
make install
Streaming audio on Mac OS X

It just so happens that in my room the speakers are on one side and the computer on the other. Running a cable from the speakers doesn’t feel like a sane idea. So — there are speakers, wi-fi, and a wi-fi-capable mobile device (in my case an iPad, but anything that can play music over wi-fi will do). I remembered that there’s a great tool called Nicecast — with one click you can set up an online broadcast. The point: stay at my desk and control the music there, but have it play on the speakers across the room. Some will say running a cable is easier, but… fuck yeah, why not over-engineer it?
The app itself is simple, though paid — but if you know where to look, that’s not really an obstacle. In the Source tab you can pick the application from which you’re broadcasting. I picked iTunes. After clicking Start Broadcast the stream begins. It doesn’t matter what’s playing in your source app. If nothing’s playing — silence will be broadcast. By default the stream goes out on port 8000; the Share tab has links for listening via an m3u file, which all modern («desktop») players understand. If you want, you can also broadcast onto the public internet, provided you have an external IP — at one point I used to listen to music at work that way, controlling the player on the other side via TeamViewer.

On the other side, as I wrote above, I have an iPad. First I tried OPlayer HD, which is supposed to be able to play files by URL, but it didn’t accept the link. I didn’t have any other players on the device. Then I just tried opening it in stock Safari — and voilà, the music plays. Which means iPhone and iPod Touch will work too. I don’t know how things are with this on Android and Windows Phone 7, but m3u files (which are basically just plain playlists) are surely played by something there as well.

Since we’re streaming over the local network, we’re not seriously bandwidth-limited and can crank the broadcast quality up to maximum in the Quality tab.
The lag is about 4–5 seconds, so watching a film this way isn’t really an option. Although it might be possible to get rid of the lag. As I understand it, Nicecast pre-buffers a few seconds before starting the stream. There’s probably a setting to disable that. I didn’t get around to checking — had to run off to work.
A few FCKEditor settings

A note to self — for quickly setting up FCKeditor. It’s outdated and the developers are working on CKEditor instead, but CKEditor doesn’t have a free file manager, while FCKEditor does.
So this is a quick reference for getting FCKEditor up and running.
-
How to make the editor produce HTML rather than XHTML:
In the editor’s folder there’s a config file fckconfig.js, with a parameter FCKConfig.DocType. By default it’s empty and the editor generates code in the xhtml standard. To switch to html you set:FCKConfig.DocType = ''; -
File manager configuration:
At fckeditor/editor/filemanager/connectors/php there’s a config.php — set $Config["Enabled"] = true ; (false by default) and set the paths for $Config["UserFilesPath"] and $Config["UserFilesAbsolutePath"].
If you want to render textareas in your code and then have JavaScript replace them with a wysiwyg editor, with CKEditor you can simply give them class="ckeditor" — FCKEditor doesn’t have that (or I never found it). So if you have more than one textarea on a page and want to swap them all for the visual editor automatically, FCKEditor (when used this way — replacement via JavaScript) can only target an element by the id or name attribute. Since two elements can’t share an id, and name is often used for posting form data, I had to write my own thing. I load the editor via script and give every textarea class="fckeditor". I wrote a small JavaScript snippet using jQuery that replaces all textareas:
$(document).ready( function() {
var $textareas = $('textarea.fckeditor');
if ( $textareas.length > 0 ) {
$textareas.each(function() {
var textareaName = $(this).attr('name');
var oFCKeditor = new FCKeditor(textareaName);
oFCKeditor.BasePath = "fckeditor/"; // your path to fckeditor goes here
oFCKeditor.ReplaceTextarea();
});
}
});
Resizing animated GIF images with Imagick
At work I ran into the need to process animated GIF avatars. The source images can be of any size, and they need to be downsized to a target size with cropping to a square. Below the cut — how we solved it.
Since our project on the server side is written in PHP, without much hesitation we decided to use the Imagick utility. We work on Ubuntu, so installing Imagick and its PHP module takes 1–2 lines and almost no time.
If you take a look at the Imagick documentation — it has plenty of capabilities. The full ready-made function is at the end of the post.
So how do you actually work with a gif?
You need to create two Imagick objects
<php
# create a new empty object
$newFileObj = new Imagick();
# the original image
$im = new Imagick( $sourceFile );
Here $sourceFile is the path to the file on the server.
The idea is fairly simple — $im is the object we’ll use to work with the GIF image. $newFileObj is the object that will store the new image data. With a simple foreach loop we iterate over $im:
<php
foreach ( $im as $newFileObj ) {
$newFileObj->setFormat("gif");
...
}
The matching $newFileObj names aren’t a coincidence. On every iteration we work with one frame of the GIF as a separate image.
Looking through the documentation it’s easy enough to find how to get the frame’s width and height. After some maths — how much and where to crop the image if it isn’t square — we crop the frame using $newFileObj->cropImage. Then via $newFileObj->setImagePage we essentially add the transformed frame into the new empty object.
Today we ran into a subtlety — not all animated GIFs were processed correctly. The problem was that, as an optimisation, the background of the image was in the first frame at full size, while every subsequent frame contained only the changing fragments — which on playback are simply overlaid on the background. You won’t notice this visually, but in fact each such frame is a separate image of a different size. And that size was smaller than the first frame, which was the one defining how the image is displayed on screen. Since we treated each frame of the GIF as a separate image, we initially thought all frames were the same size. They weren’t — and we had to take that into account.
For each frame-image we had to compute not just the new size, so it’s proportional to the whole image, but also the coordinates so that the animation appears in the right place. It bent my brain quite a bit, at the very least.
Going through the entire solution doesn’t feel useful. The key part of the function:
$im = $im->coalesceImages();
foreach ( $im as $newFileObj ) {
$newFileObj->setFormat("gif");
$new_x = 0;
$new_y = 0;
$tmp_new_width = $newWidth;
$tmp_new_height = $newHeight;
$imagePage = $newFileObj->getImagePage();
# width and height of the cropped area
# vertical image
if ( $originalWidth < $originalHeight ) {
$cutedWidth = $originalWidth;
$cutedHeight = $originalWidth;
} else {
# horizontal image
$cutedWidth = $originalHeight;
$cutedHeight = $originalHeight;
}
$resize_ratio = $cutedHeight / $biggestSideSize ;
$offset_y = $imagePage['y'];
# if the frame size doesn’t match the size of the image itself
if ( $newFileObj->getImageWidth() < $newWidth ) {
$tmp_new_width = round( $newFileObj->getImageWidth() / $resize_ratio );
$tmp_new_height = round( $newFileObj->getImageHeight() / $resize_ratio );
$offset_x = $imagePage['x'];
$new_x = round( $offset_x / $resize_ratio );
$new_y = round( $offset_y / $resize_ratio );
} else if ( $newFileObj->getImageHeight() < $newHeight ) {
$tmp_new_width = round( $newFileObj->getImageWidth() / $resize_ratio );
$tmp_new_height = round( $newFileObj->getImageHeight() / $resize_ratio );
$offset_x = $imagePage['x'] - ( $originalWidth - $cutedWidth )/2;
$new_x = round( $offset_x / $resize_ratio );
$new_y = round( $offset_y / $resize_ratio );
}
// Resize down to 200 pixels in width and whatever it works out to in height (preserving aspect ratio, of course)
$newFileObj->thumbnailImage( $tmp_new_width, $tmp_new_height );
if ( $newFileObj->getImageHeight() >= $biggestSideSize || $newFileObj->getImageWidth() >= $biggestSideSize ) {
$newFileObj->cropImage( $biggestSideSize, $biggestSideSize, $src_x, $src_y );
} else {
$newFileObj->cropImage( $biggestSideSize, $biggestSideSize, 0, $src_y );
}
$newFileObj->setImagePage( $newFileObj->getImageWidth(), $newFileObj->getImageHeight(), $new_x, $new_y );
}
$newFileObj->writeImages( $destinationFile, true);
return image_type_to_extension( $info[2], false );
Worth highlighting one line:
$im = $im->coalesceImages();
During testing it turned out that when producing small avatars there were artefacts on the output. This line gets rid of them. Thanks to suxxes for the tip.
Here is the resulting function on its own. The function produces a square of the requested size depending on the image type. It understands gif, jpg/jpeg and png. It contains commented-out debug lines (a dbg function) — feel free to uncomment them to see how it works.
Full function with code and a download link.
As an example of a GIF where every frame is a different size, try this one: