$ grep -r Tag: «ios»
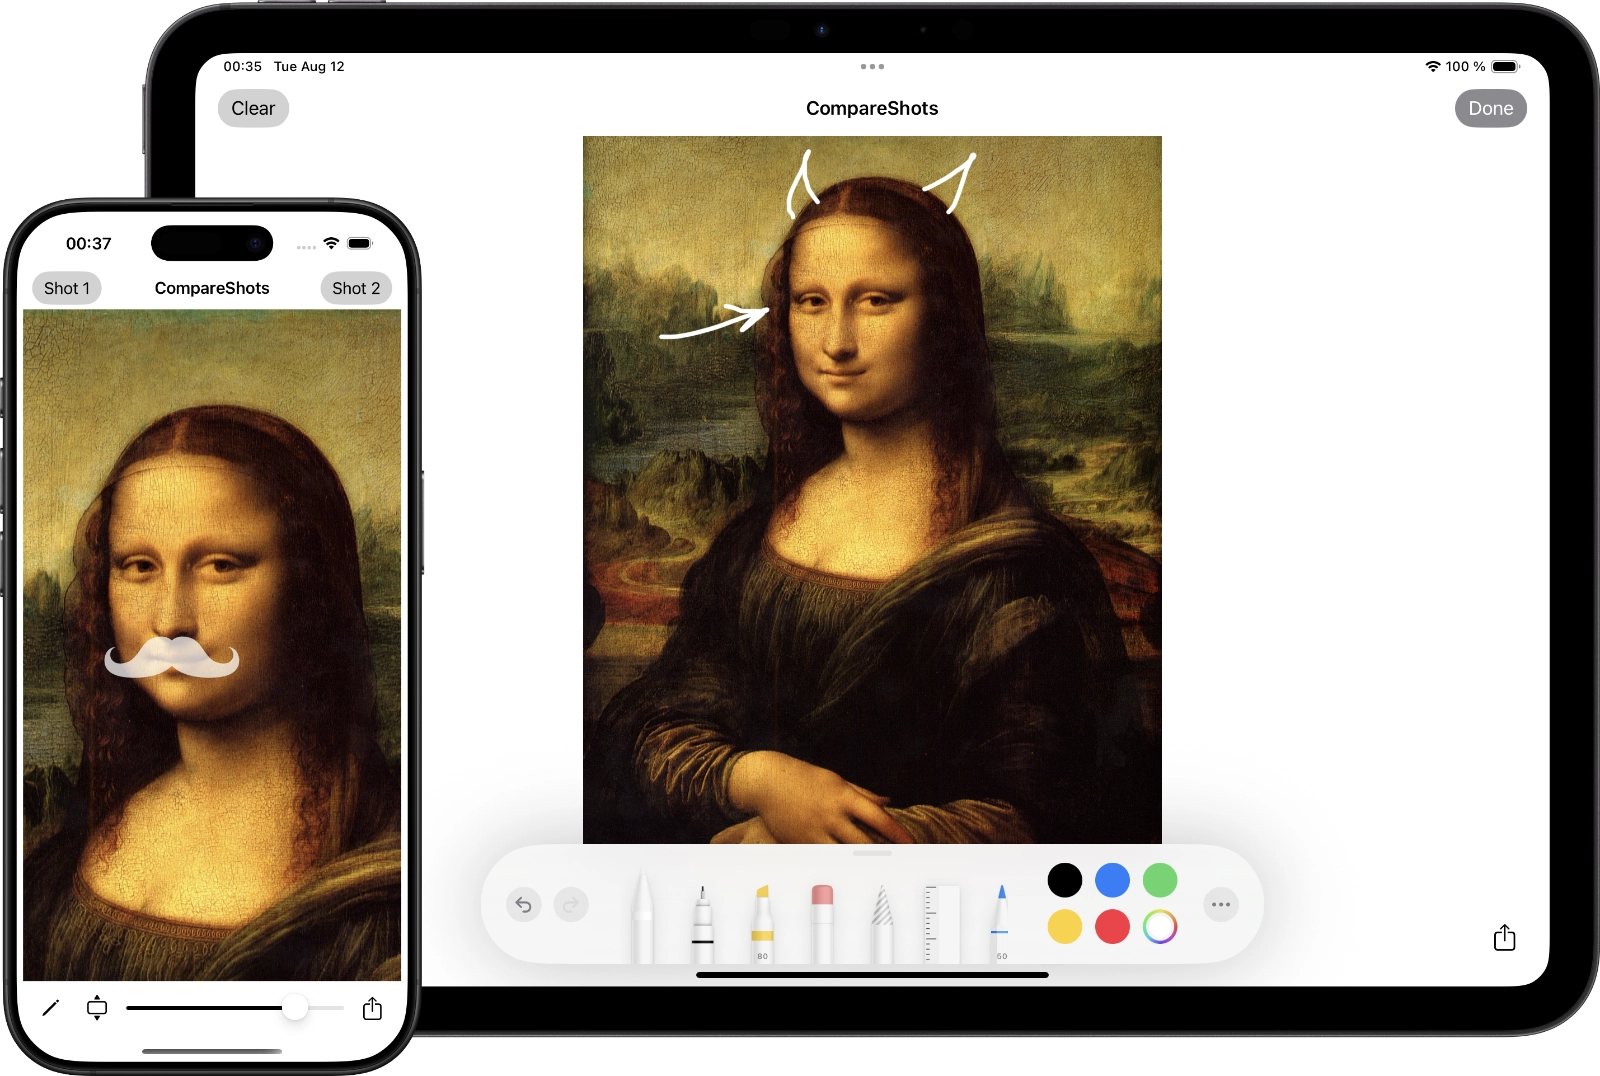
CompareShots 1.6
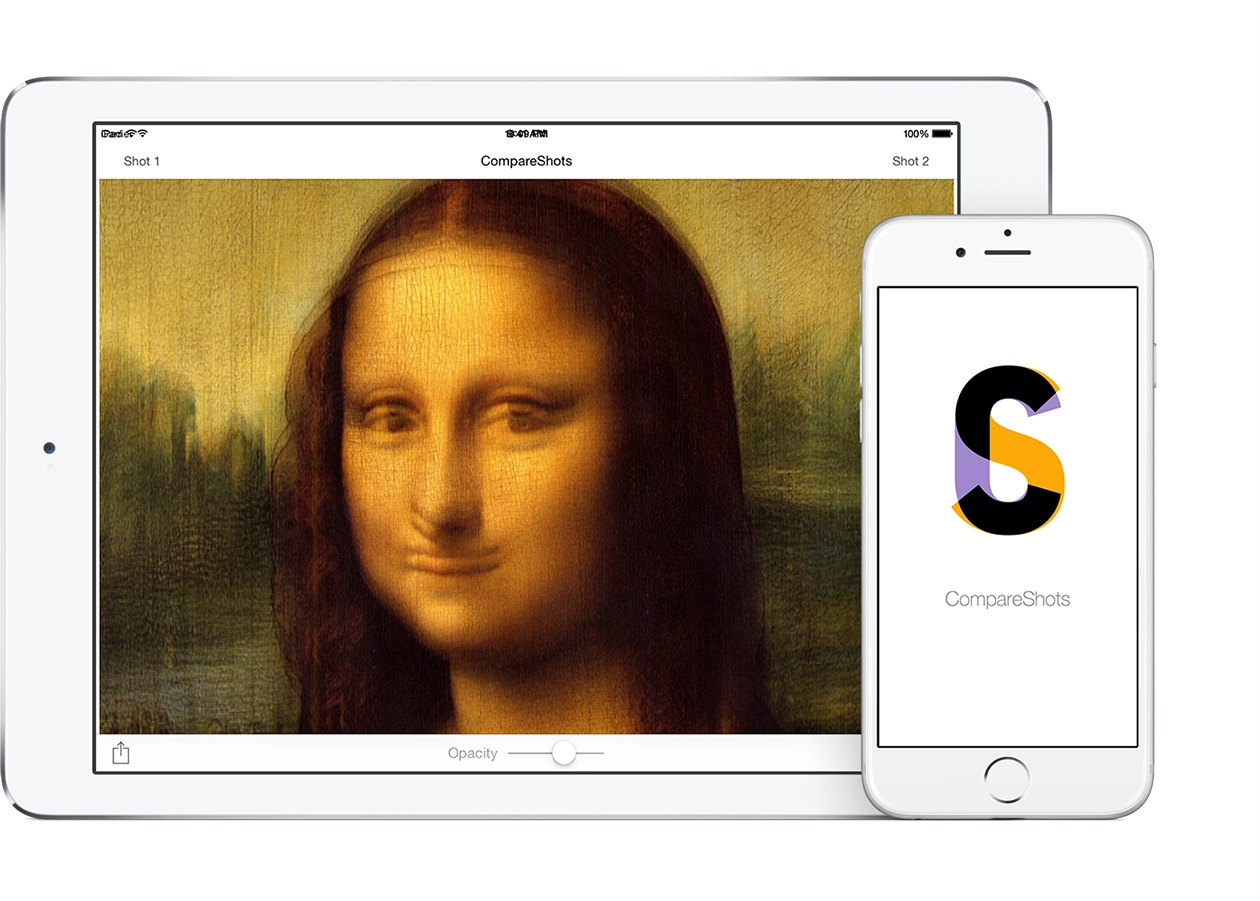
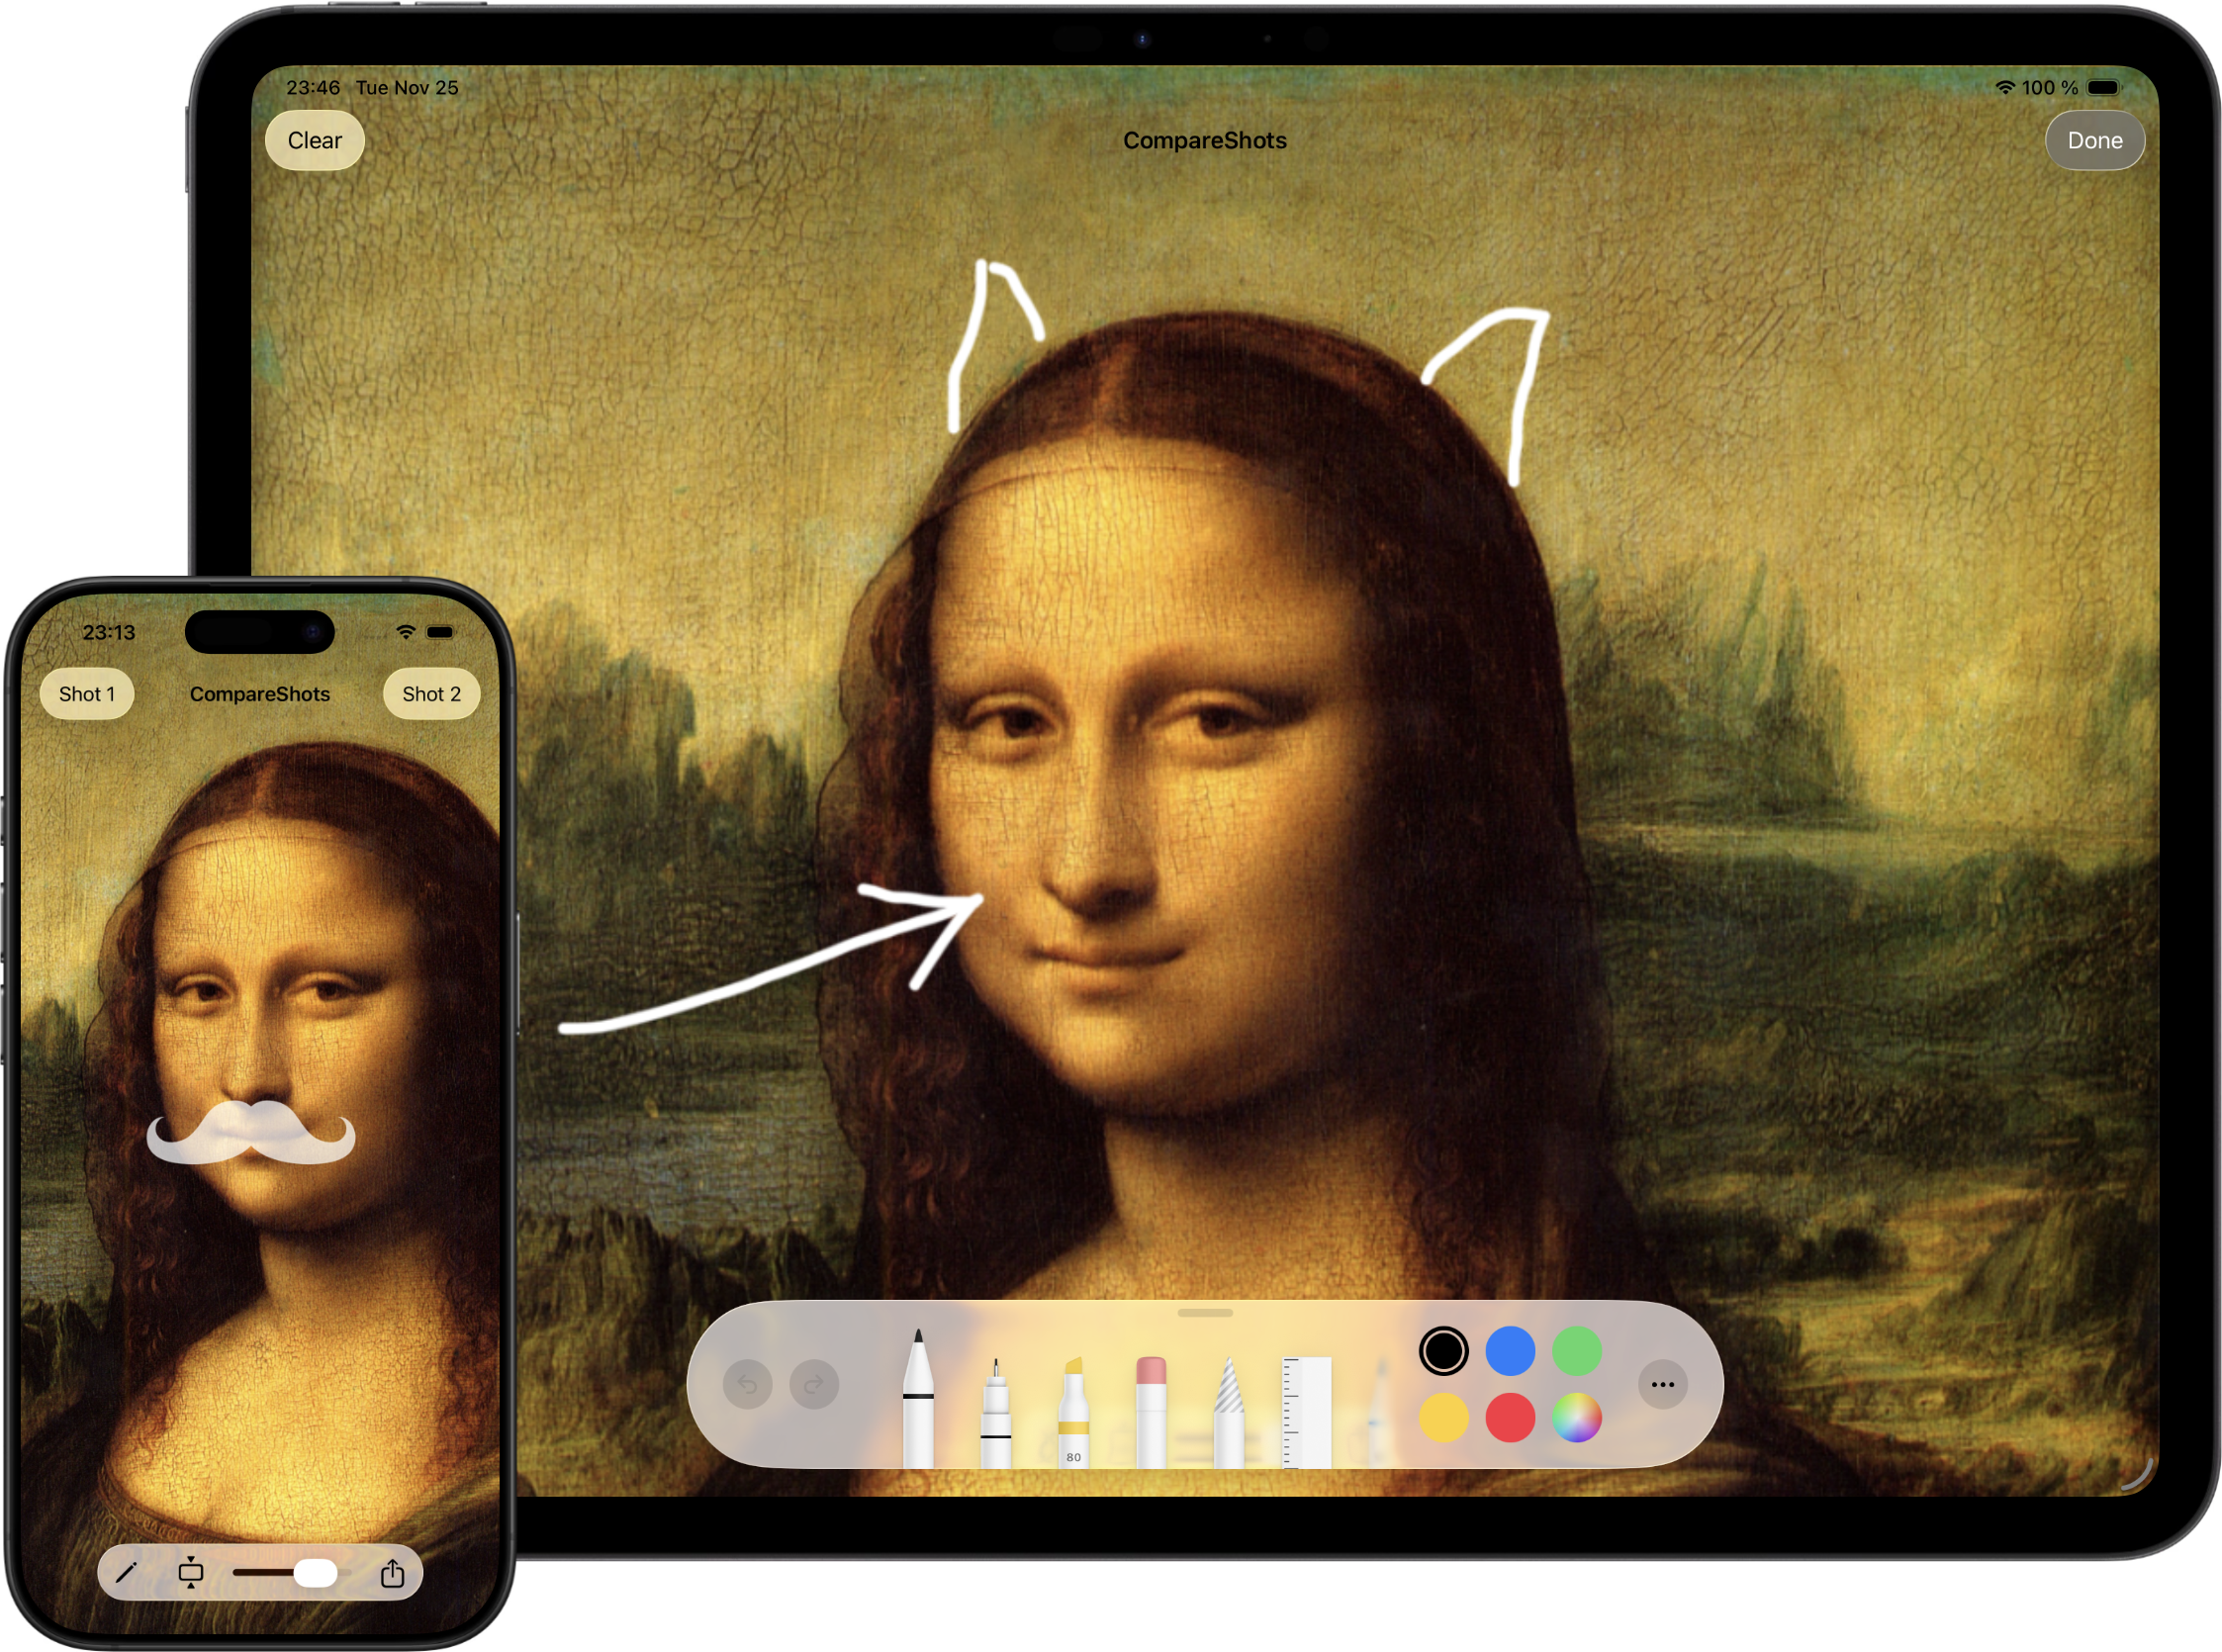
A new version of CompareShots has been released. It's a simple app I wrote years ago to compare two images.
The new version 1.6 has been rewritten in SwiftUI. And I've implemented a couple of ideas from app reviews that a user suggested.
What's new:
- Choose your view: Easily switch between aspect fill and aspect fit with a new button.
- Move your images: In aspect fill mode, use two fingers to reposition images for the perfect comparison.
- Faster setup: Select up to two images at once for side-by-side comparison.
- Expanded language support and improved accessibility.
- Various bug fixes and performance enhancements for a faster, more reliable app.
- Various bug fixes and performance improvements.
Animating the UISlider Thumb on Touch
I had a task to animate the slider in the app on touch by smoothly enlarging the thumb. Just like Apple does in the Apple Music and Podcasts player when you start scrubbing the playback position. I spent quite a lot of time looking for a way to do it with standard tools. I really did not want to write a completely custom slider; I wanted to use the system UISlider, and in the end I managed to do exactly that.
UISlider inherits from UIControl. It lets you set your own position image for a specific state:
open func setThumbImage(_ image: UIImage?, for state: UIControlState)
The .normal state is the regular slider state, and the .highlighted state is when we are touching the slider.
If we simply assign different images to two different states, we get a larger thumb. The only problem is that it will not be animated at all. You can animate a UIControl state transition from one state to another, but what happens is an image replacement, not a size change. I tried various transitions such as CATransition, but the best I could achieve for the state change animation was a smooth Fade In of the larger image for the .highlighted state, while what I needed was a smooth enlargement of the thumb itself.
So I had to abandon the idea of assigning two different images to different slider states. In the end I came up with this funny hack.
For convenience, let us add a function to the project that creates a circle of the required color and size and returns it as a UIImage:
extension UIImage {
class func circle(diameter: CGFloat, color: UIColor) -> UIImage {
UIGraphicsBeginImageContextWithOptions(CGSize(width: diameter, height: diameter), false, 0)
let ctx = UIGraphicsGetCurrentContext()
ctx!.saveGState()
let rect = CGRect(x: 0, y: 0, width: diameter, height: diameter)
ctx!.setFillColor(color.cgColor)
ctx!.fillEllipse(in: rect)
ctx!.restoreGState()
let img = UIGraphicsGetImageFromCurrentImageContext()
UIGraphicsEndImageContext()
return img!
}
}
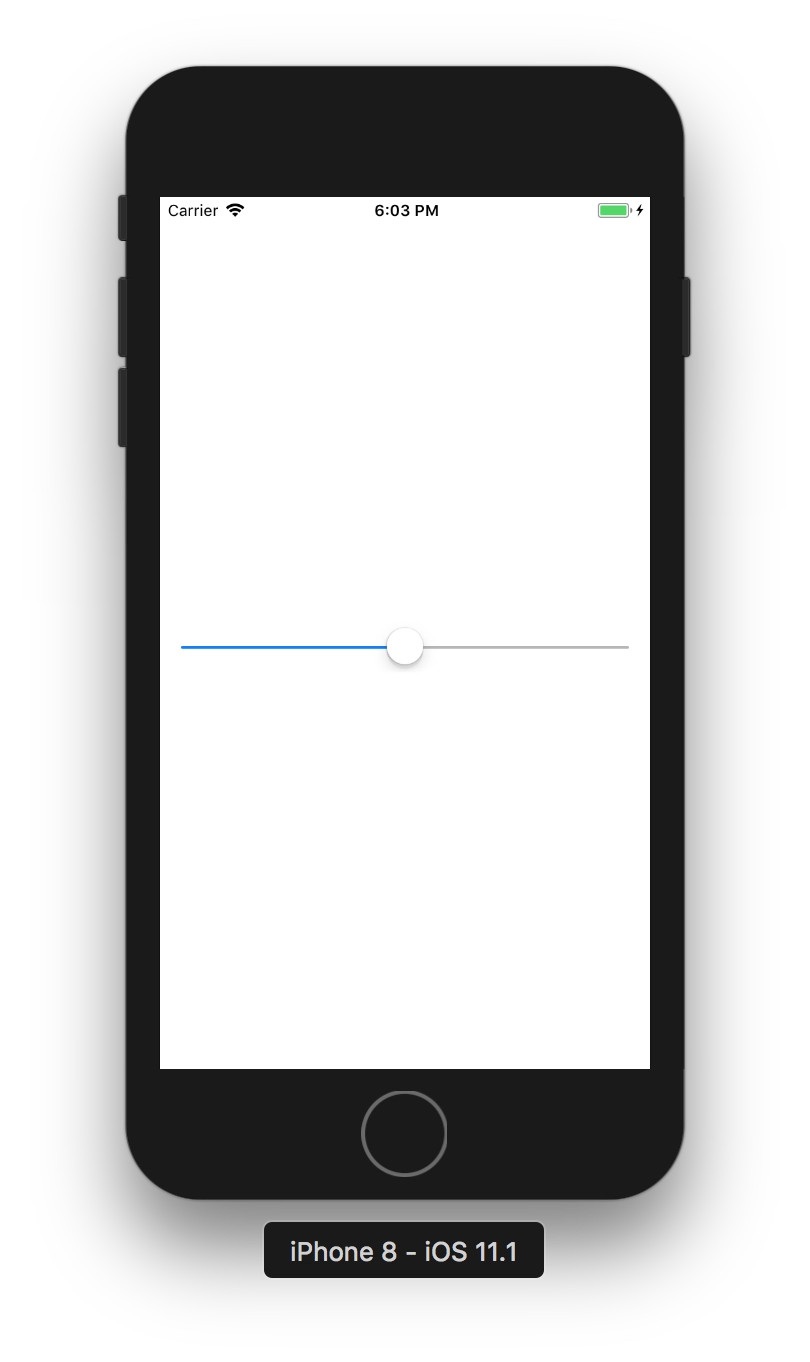
Add a standard UISlider:
The next step is to create our own class that inherits from UISlider, and set the image in awakeFromNib():
class Slider: UISlider {
override func awakeFromNib() {
super.awakeFromNib()
let positionImage = UIImage.circle(diameter: 30, color: UIColor.blue)
self.setThumbImage(positionImage, for: .normal)
}
}
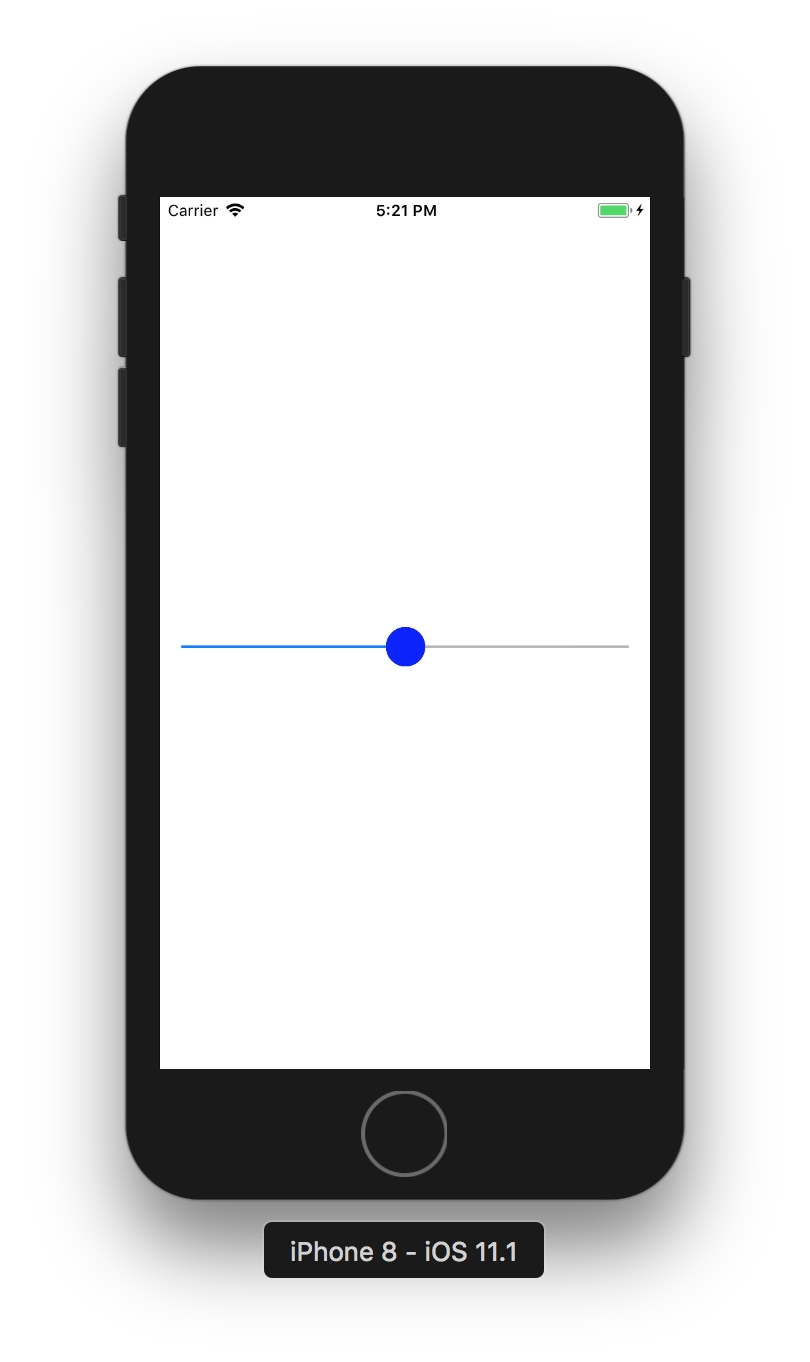
In Interface Builder, set the Class field of our slider to the name of our subclass (Slider). We get a slider with a position thumb of the desired color:
Now we need to add an image for the enlarged thumb that will appear on touch. We do this by simply adding a UIImageView:
class Slider: UISlider {
/// Big position image view
var bigImage = UIImageView()
override func awakeFromNib() {
super.awakeFromNib()
let positionImage = UIImage.circle(diameter: 30, color: UIColor.blue)
self.setThumbImage(positionImage, for: .normal)
let positionImageBig = UIImage.circle(diameter: 60, color: UIColor.blue)
self.bigImage.contentMode = .scaleAspectFit
self.bigImage.clipsToBounds = false
self.bigImage.image = positionImageBig
self.addSubview(bigImage)
self.bringSubview(toFront: bigImage)
}
}
Next, we need to use the UISlider method that calculates the frame for the thumb image:
open func thumbRect(forBounds: CGRect, trackRect: CGRect, value: Float)
The idea is to use this method to obtain and return the thumb frame without interfering with its normal inactive size (or, if you want, while interfering with it). After that we take the UIImageView with the large thumb and tell it to have the same position and the same size. This method is called continuously while we drag our UISlider, so the big indicator always stays in exactly the same place as the standard one and, for now, at exactly the same size:
class Slider: UISlider {
// ... previous code
/// Small indicator counted size
var indicatorSize: CGSize? = nil
override func thumbRect(forBounds bounds: CGRect, trackRect rect: CGRect, value: Float) -> CGRect {
let unadjustedThumbrect = super.thumbRect(forBounds: bounds, trackRect: rect, value: value)
let origin = unadjustedThumbrect.origin
let size = unadjustedThumbrect.size
if self.indicatorSize == nil && unadjustedThumbrect.size.width > 0 {
self.bigImage.frame = unadjustedThumbrect
self.indicatorSize = size
}
let bigImageSize = self.bigImage.frame.size
self.bigImage.frame.origin = CGPoint(
x: origin.x - (bigImageSize.width/2 - size.width/2),
y: origin.y - (bigImageSize.height/2 - size.height/2)
)
self.bringSubview(toFront: bigImage)
return unadjustedThumbrect
}
}
Visually you do not see any difference yet, but together with the built-in thumb we now always have an image for the enlarged state at the same position, moving together with it.
And finally, when the user touches the slider, we simply animate the enlargement of our bigImage. And, accordingly, shrink it when the touch ends. For that we use the built-in isHighlighted property of UISlider and animate when its value changes:
class Slider: UISlider {
override var isHighlighted: Bool {
didSet {
// avoid situation when indicator size didn't count yet
guard self.indicatorSize != nil else { return }
UIView.animate(withDuration: 0.3) {
if self.isHighlighted == true {
self.bigImage.transform = CGAffineTransform(scaleX: 2, y: 2)
} else {
self.bigImage.transform = CGAffineTransform(scaleX: 1, y: 1)
}
}
}
}
// ..other code
}
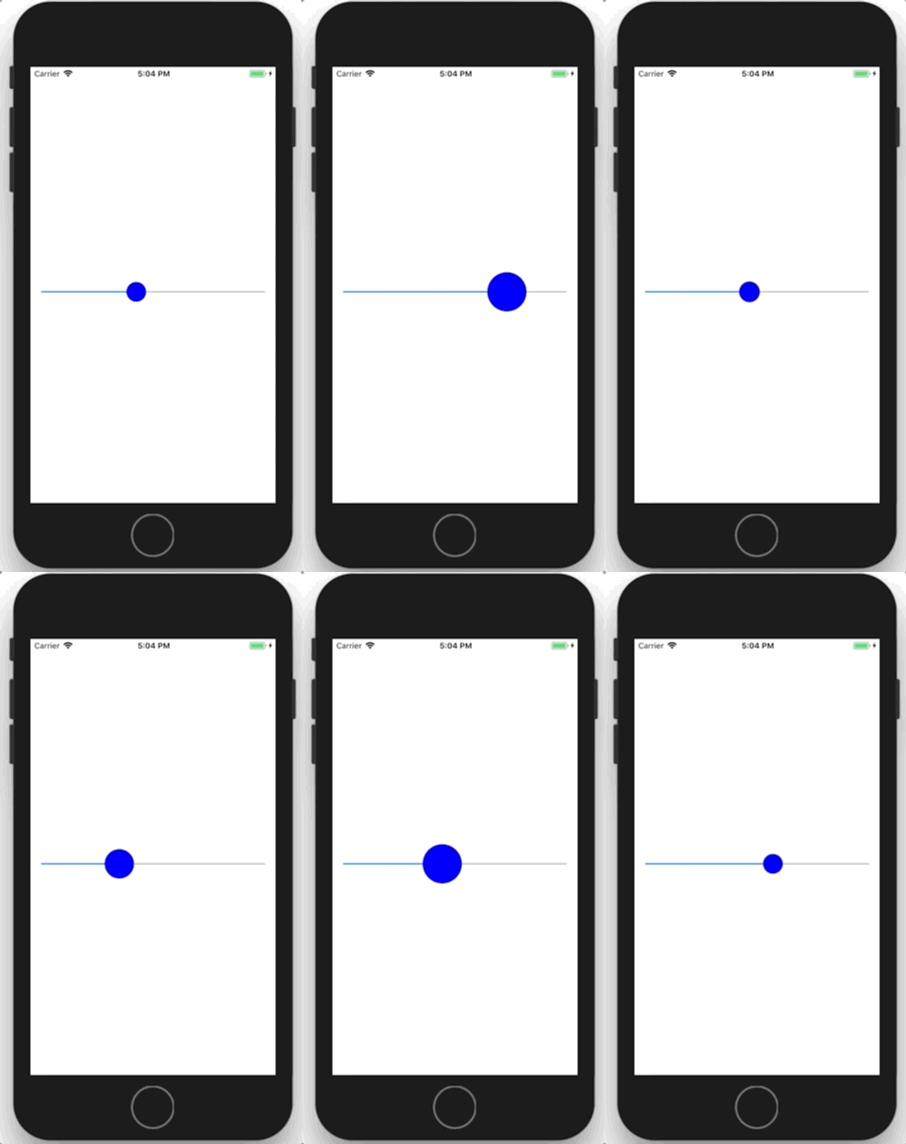
Done. The position thumb in the slider is now animated when interacting with it:
You can see the full code on GitHub: https://github.com/makoni/CustomUISlider
SMS Anticredit
I got tired of the SMS spam that periodically comes to me — offers for loans, mortgages, and so on. While watching one of the WWDC videos, I noticed that Apple had provided an API for filtering SMS messages. If your filter triggers, such messages arrive silently, without a sound or vibration, and go into a separate spam category in Messages.
Without much hesitation, I made this filter and uploaded it to the App Store. Hopefully it will be useful to someone besides me.
CompareShots v1.2
CompareShots version 1.2 has been released.
I released it because one of the users emailed me asking to hide the logo and text after an image is selected, because otherwise, if the image is not full-screen, they stick out from behind it or show through. While I was at it, I decided to level up the app a bit more. At last, my subscription to various new libraries came in handy. Now you can draw on top of images. With different colors and brushes of different sizes. One evening, and this beauty was ready :)
CompareShots v1.1
CompareShots version 1.1 has been released.
What is new: transparency now changes simply by dragging your finger horizontally. One of the users actually asked for this feature in an email. It also makes the transparency change more smoothly.
Besides that, I completely rewrote the app in Swift. So now I have as many as one released project written in it :) But this is only the beginning.
What is surprising is that I submitted the App Store update yesterday, and in less than a day it had already passed Review and been released. I do not remember Apple ever approving an app that fast.
Building an iOS Project from the Console with xcodebuild
I'll leave myself a cheat sheet on how to make a bash script that builds your project into an ipa file.
In the iOS project source folder, create a folder, for example, scripts, and inside it create the file build.sh
mkdir scripts
touch build.sh
chmod +x build.sh
Put your provisioning profile into that folder. Say it is called arm1.ru.mobileprovision. After that, put this code inside build.sh:
#!/bin/bash
# go to the script directory
CURRENT_DIR="$( cd "$( dirname "${BASH_SOURCE[0]}" )" && pwd )"
cd "${CURRENT_DIR}"
# use the same name that is selected in the project settings under Build Settings > Code Signing Identity
CODE_SIGN_IDENTITY="iPhone Distribution: Your Code Signing Identity"
# name of the provisioning profile stored here
PROVISION="$PWD/arm1.ru.mobileprovision"
# name of the scheme we are building
SCHEME="appScheme"
WORKSPACE="$PWD/../your-app.xcworkspace"
echo "Building..."
BUILDDIR="$PWD/build"
DSYMDIR="$PWD/dSYM"
if [ ! -d "$BUILDDIR" ]; then
mkdir -p "$BUILDDIR"
fi
if [ ! -d "$DSYMDIR" ]; then
mkdir -p "$DSYMDIR"
fi
# find the UUID in the provisioning profile
UUID=`grep UUID -A1 -a "${PROVISION}" | grep -io "[-A-Z0-9]\{36\}"`
xcodebuild -workspace "${WORKSPACE}" -scheme "${SCHEME}" -sdk iphoneos -configuration Release CODE_SIGN_IDENTITY="${CODE_SIGN_IDENTITY}" PROVISIONING_PROFILE="${UUID}" OBJROOT=$BUILDDIR SYMROOT=$BUILDDIR
if [ $? != 0 ]; then
echo "Build failed"
exit 1
fi
echo "Packaging..."
NOW=$(date +"%d_%m_%Y_%H_%M_%S")
xcrun -sdk iphoneos PackageApplication -v "${BUILDDIR}/Release-iphoneos/${SCHEME}.app" -o "$PWD/${SCHEME}_${NOW}.ipa"
if [ $? != 0 ]; then
echo "Packaging failed"
exit 2
fi
mv "${BUILDDIR}/Release-iphoneos/${SCHEME}.app.dSYM" "${DSYMDIR}/${SCHEME}_${NOW}.app.dSYM"
echo "Build succeeded."
Voilà, in the folder with the script you now have appScheme.ipa - the built project. The dSYM folder contains the dSYM files. You can add something else at the end of the script. In one of my projects, the end uploads the build to our homemade Testflight and sends the install link to everyone who needs it. Convenient: double-click the sh file and everything gets built and sent.
How to Disable the Swipe Back Gesture in iOS 8
iOS has a system gesture - swipe from the left edge of the screen and you go back to the previous screen. It's cool and intuitive, and it annoys me when apps disable it, but sometimes you still have to do it. For example, because of an interface decision that conflicts with this swipe.
So for iOS 8, add this to the current UIViewController:
in YouViewController.h:
// add the gesture handling protocol
@interface YouViewController : UIViewController <UIGestureRecognizerDelegate>
in YouViewController.m:
- (void)viewDidLoad {
[super viewDidLoad];
self.navigationController.interactivePopGestureRecognizer.enabled = NO;
self.navigationController.interactivePopGestureRecognizer.delegate = self;
}
#pragma mark - UIGestureRecognizerDelegate
- (BOOL)gestureRecognizerShouldBegin:(UIGestureRecognizer *)gestureRecognizer {
// disable the gesture if this is swipe back
if ([gestureRecognizer isEqual:self.navigationController.interactivePopGestureRecognizer]) {
return NO;
} else {
return YES;
}
}
CompareShots
Released a new app - CompareShots.
While working, I had the thought that it would be nice to have some kind of tool for comparing the mockup and the actual result. I wrote this little tool in one evening. Then I spent a few more evenings making screenshots. Yeah, the screenshots took more time :)
The app lets you choose 2 images from the device library. For example, a designer's app or website mockup and a screenshot of what the developer built, and check whether it really matches pixel for pixel. While you keep your finger on the screen, the first image is shown. Take it away, and the second one appears. There is a transparency slider, so you can clearly see where things do not match. The mismatch result as an image can be shared, emailed, or sent to any other app that accepts images.
App for iPhone and iPad.
iPodpiski: Final Results
So, in February Yandex forcibly moved all Yandex.Subscriptions users to the Yandex.News service. Without warning, and the whole thing turned out pretty badly. The web version became unavailable. But the API kept working, and the Yandex folks only said that it would continue working. They kept quiet about deadlines and plans. First, new RSS entries stopped being pulled in and the API gave access only to old entries, and then they sent everyone emails saying that on March 31, 2015 they would shut down the API too. Which is what happened. So I removed the iPodpiski app from the App Store and want to sum up some results for myself and for the record.
I wrote the app in spring 2014 in about a week, coding in the evenings. It appeared in the App Store on April 17, 2014, which I happily wrote about on my site and in a post on Habr. The post got a +15 rating and brought some downloads and feature requests. The app fell 17 days short of its first birthday :)
Over that year there were:

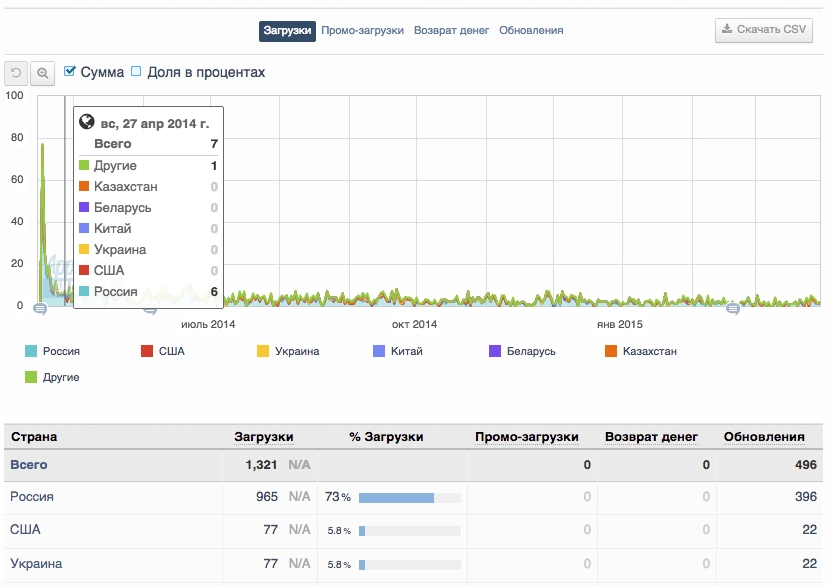
1321 downloads of the app and only 496 updates when I released new versions. Not much, but then this is not a mass-market app. RSS is generally considered a technology for robots and geeks. The overwhelming majority of users were from Russia. In 2nd and 3rd place were the US and Ukraine, tied. Record: 77 installs in one day.

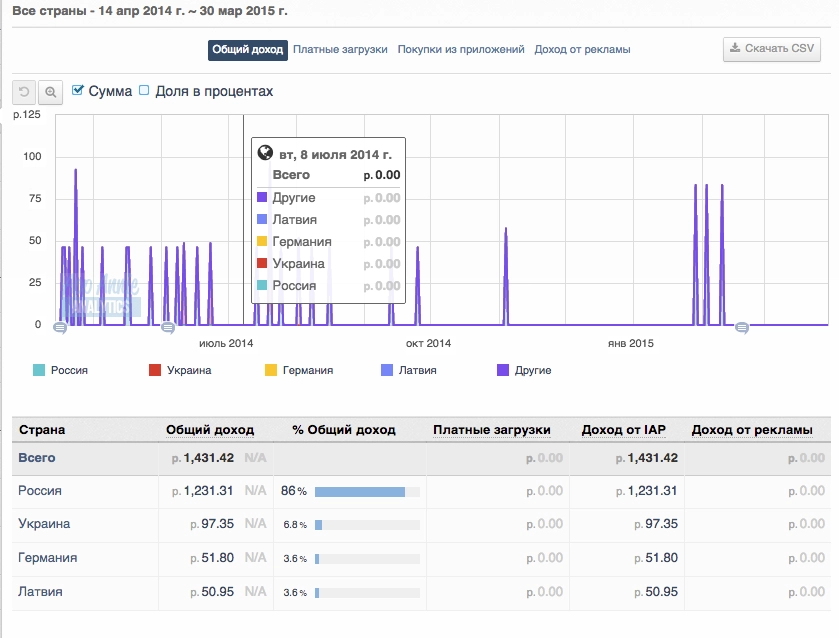
1431.42 rubles of revenue from in-app purchases. Initially the app was free, but with ads and a paid option to disable them. Of my 4 apps in the App Store, this is the worst result. On the other hand, getting some money for learning, gaining experience, and solving one of your own problems is not bad either :)

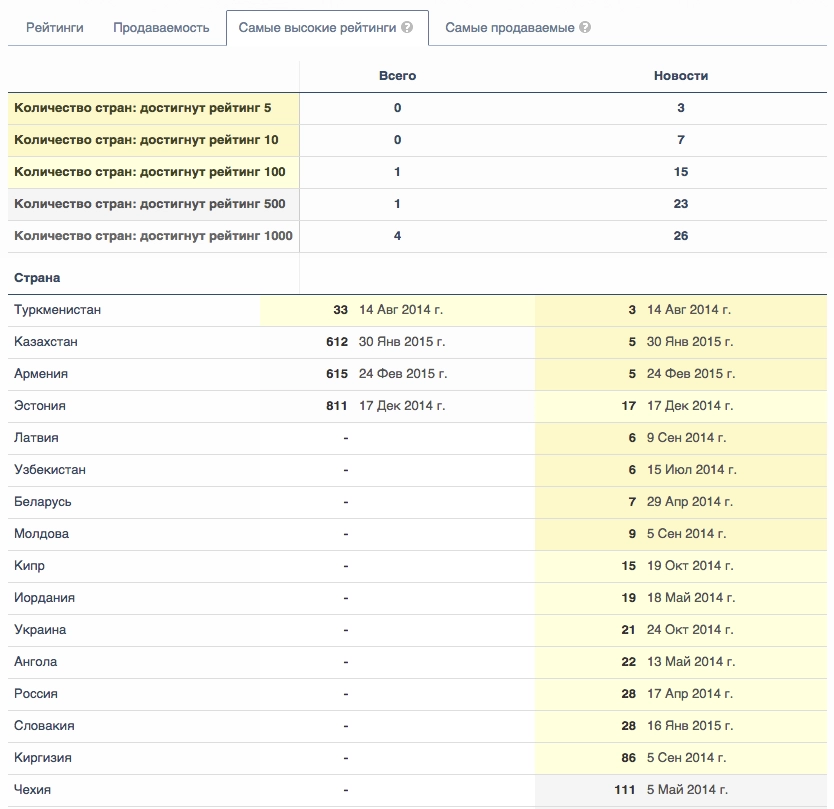
Most of the time the app was in the Top 200 in its category (News) in Russia. The screenshot above shows the highest positions it managed to crawl to in the charts.

Ratings were not great. I never asked people to rate the app anywhere, so ratings were left either by enthusiasts and friends, or by dissatisfied users. Unfortunately, I missed a very annoying bug. When the app launched in portrait mode, the «All Subscriptions» button simply did not appear. As a result, the user saw only the welcome screen and the paid «remove ads» button :) Sad and funny at the same time. I myself constantly used the app in landscape mode and simply did not notice this problem, but I got reviews like «only the ads work».
Most of the requested features I never managed to implement because of lack of time. When you spend the whole day doing web development, it is hard to switch to mobile in the evening, especially when you are tired after work.
The app shows ads from AdMob. Over the year there were only 71135 ad impressions, which brought in $23.87. In other words, the in-app purchase to disable ads brought in more money than the ads themselves :)
So those are the modest results.
iPodpiski and the Shutdown of Yandex.Subscriptions
Since Yandex shut down its Yandex.Subscriptions service and forcibly moved everyone to Yandex.News, I think this is the end for iPodpiski. Unless they make a public API for Yandex.News. If it is good enough for a port, I'll try to move iPodpiski to the new API. But there is no API yet. The Yandex.Subscriptions API itself still works for now, but they have stopped collecting new news from RSS feeds. The latest news I have there is from February 5-6. I have switched to Feedly myself. Thanks to everyone who used it :)
UPDATE: an email arrived saying that the subscriptions API will be shut down on March 31. Apparently I'll have to remove the app from the App Store too.
Escaping the sandbox in iOS
A post born of pain. It just so happens that right now I am poking at someone else’s project that is designed to run on jailbroken iPhones. And not just run on them — it needs access outside the sandbox.
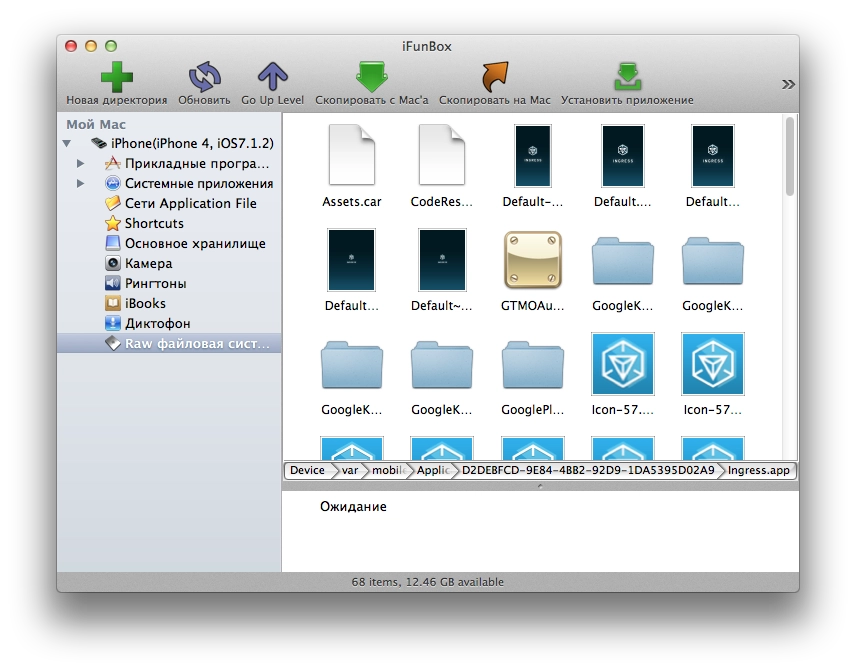
As everyone knows, all apps in iOS run inside a sandbox and cannot go outside it. All App Store apps are installed into /var/mobile/Applications/ (apps installed onto an iPhone from Xcode go there as well), where a separate folder with an unreadable name is created for each app. You cannot go outside that folder. Not for reading and certainly not for writing.
This, for example, is the folder of Google’s Ingress game.
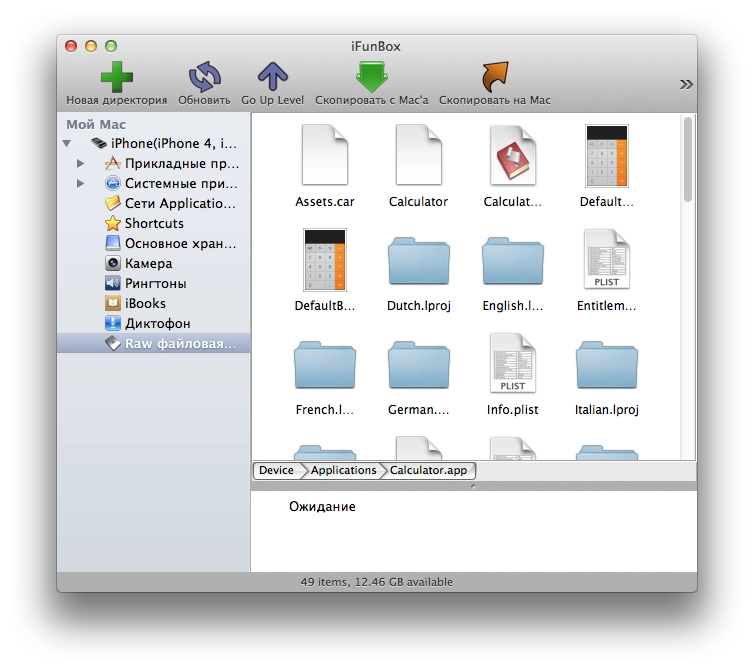
And this is the iOS Calculator app, for example, living in /Applications.
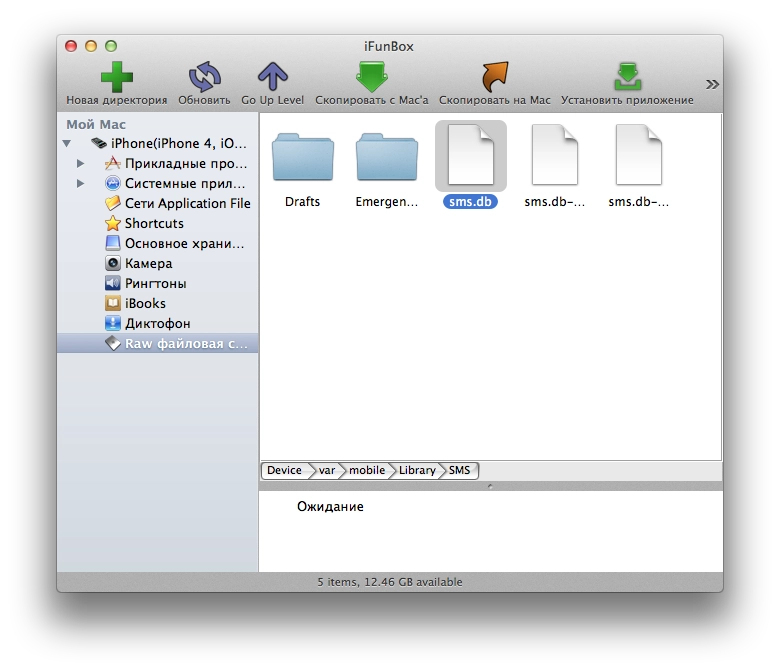
If we want, for example, to read the phone’s SMS messages from inside an app, we need to read the file /var/mobile/Library/SMS/sms.db — it is a regular SQLite database with no encryption or protection. You can download it from a jailbroken phone and open it with any tool that knows how to open SQLite files, look at all SMS messages, and even hammer it with sql queries for search and other tasks.
Here, for example, is the file with all iPhone SMS messages.
So, there is no access to that file from the sandbox. And Jailbreak does not solve that. It gives full access to the file system, but only if you are working outside the sandbox.
For an app to work outside the sandbox, it has to be moved from /var/mobile/Applications/ to the /Applications directory. Then the app will live in the system apps folder, have access to the file system on a jailbroken device, not be removable from the phone by holding a finger on its icon, and so on.
And that is where the pain starts: Xcode simply cannot install the app there; it can install only into the sandbox. You can do it by hand — connect to the phone and move it with something like iFunBox — but that is a huge pain every single time. The worst part is that you lose the convenience of debugging. You cannot run the app on the device from Xcode and calmly watch the console to see what your app is printing and whether it is working.
No tweaks from Cydia that supposedly give apps file-system access even from inside the sandbox had any effect. At least not for me on iOS 7.1.2. They say that even if you run the app as root but still inside the sandbox, it still will not get permission to read system directories. Although it feels like this used to work before, but jailbreaks were different back then too.
That is the hell I am in. In the near future I am going to try some scripts I found online to automate moving the app around inside the iPhone after the build via SSH while also capturing syslog. I also want to write up what I have dug out inside the iPhone in terms of “where everything is stored”, but later, once this hell is over :)
Linode client for iPhone
I have been using Linode.com hosting services for several years now. That is where I keep my VPS with sites / projects and for various personal purposes.
They have an API, and as far as I understand, they built an iPhone client on top of it.
The client looks like it was just reskinned.
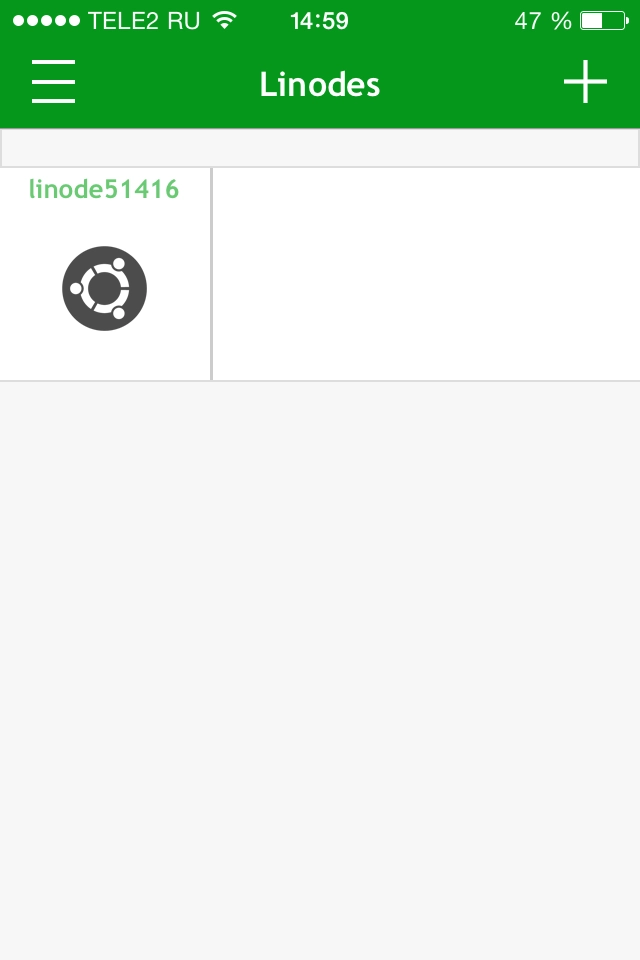
You log in and see the list of all your servers. In my case there is only 1 :)
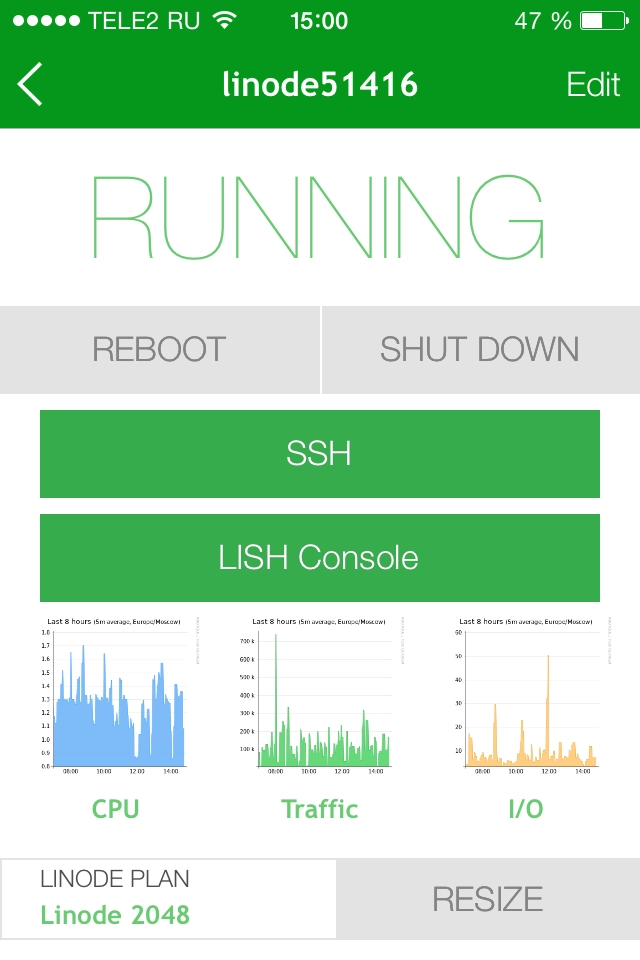
Tap the server and you see the first bit of beauty. The VPS can be rebooted or even powered off entirely.
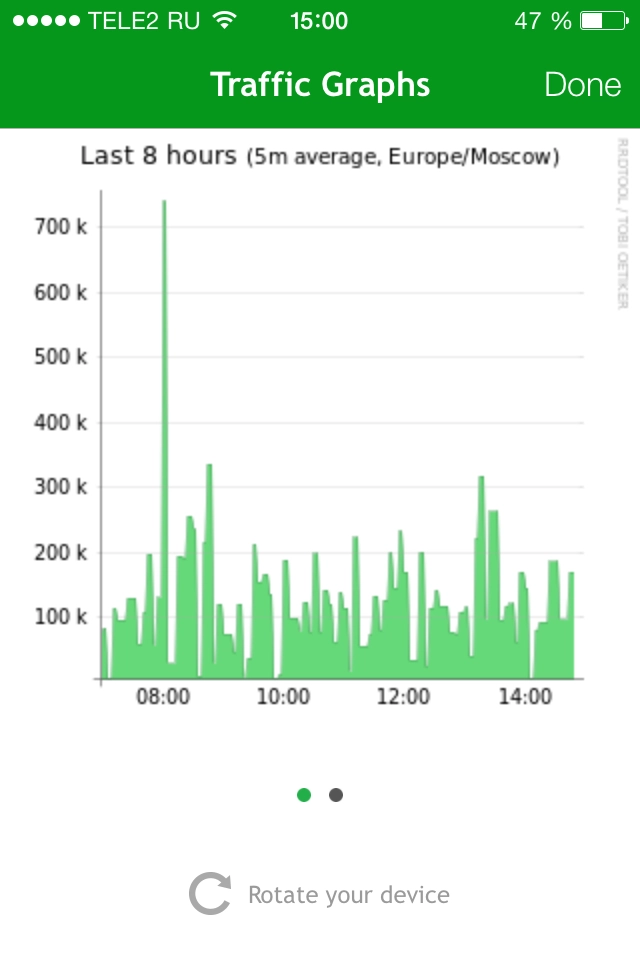
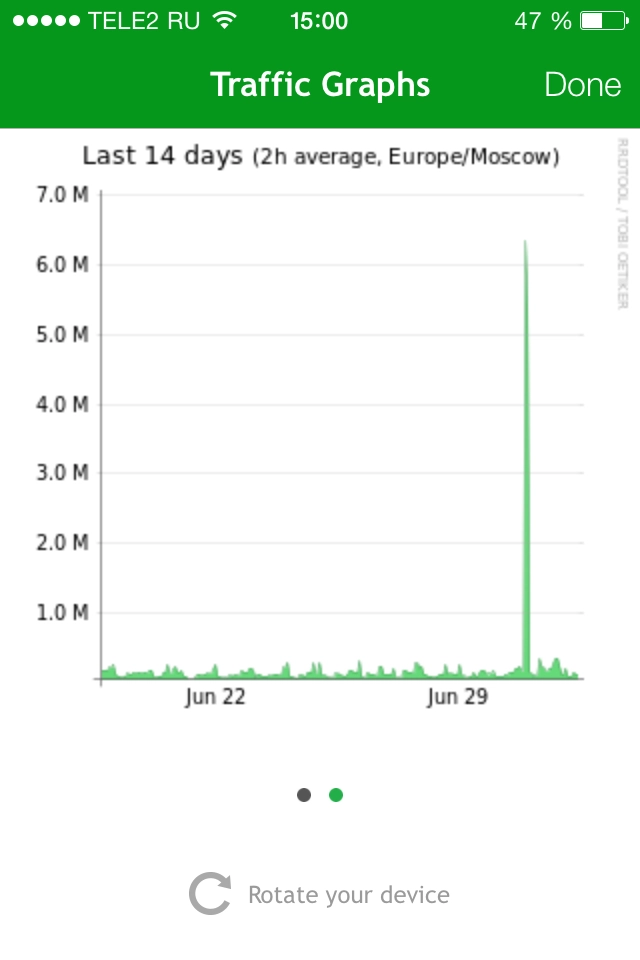
Next come graphs for CPU load, traffic, and disk activity. They show activity either for the last 8 hours or for the last 2 weeks. In practice that is usually more than enough.
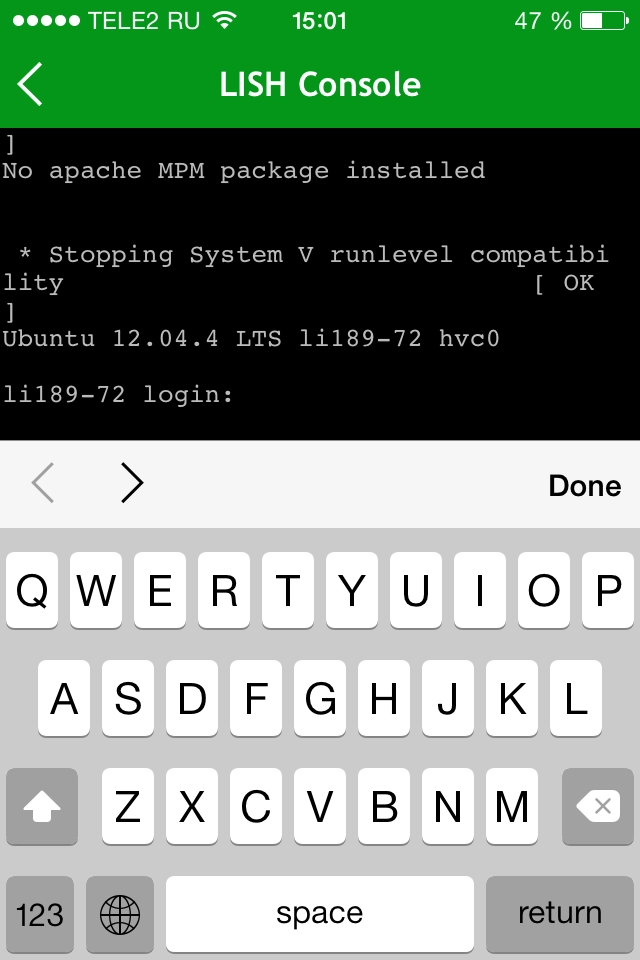
You can also connect over SSH right there (although some SSH client has to be installed on the iPhone; otherwise it complains). Under the SSH button there is a LISH Console button — that is something like a web console. In other words, there is a built-in SSH client. You can quickly log in and restart a crashed Nginx, for example.
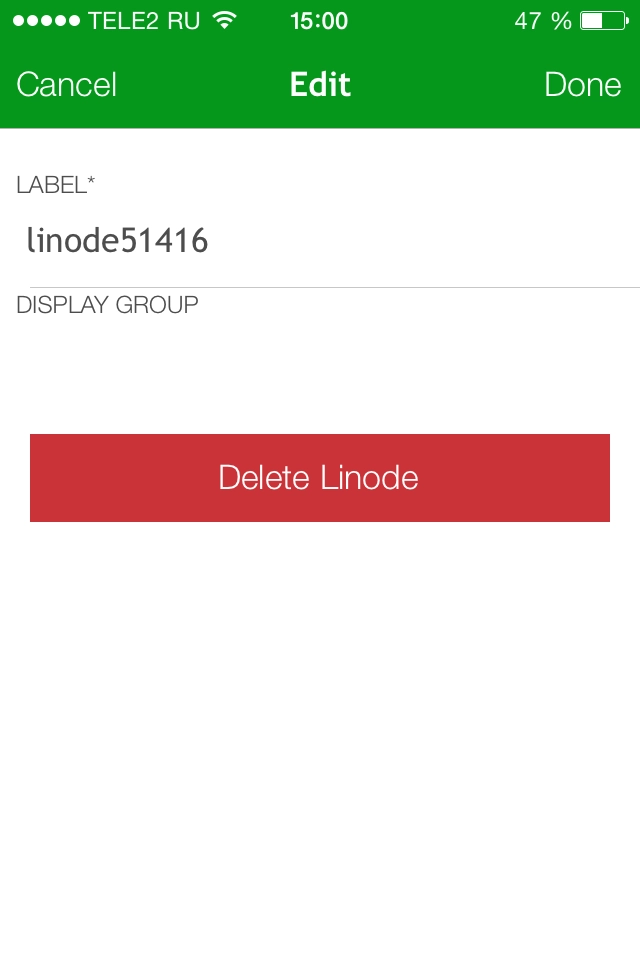
There is an edit server button, but there you can only rename it and assign it to some group.
But that is far from all.
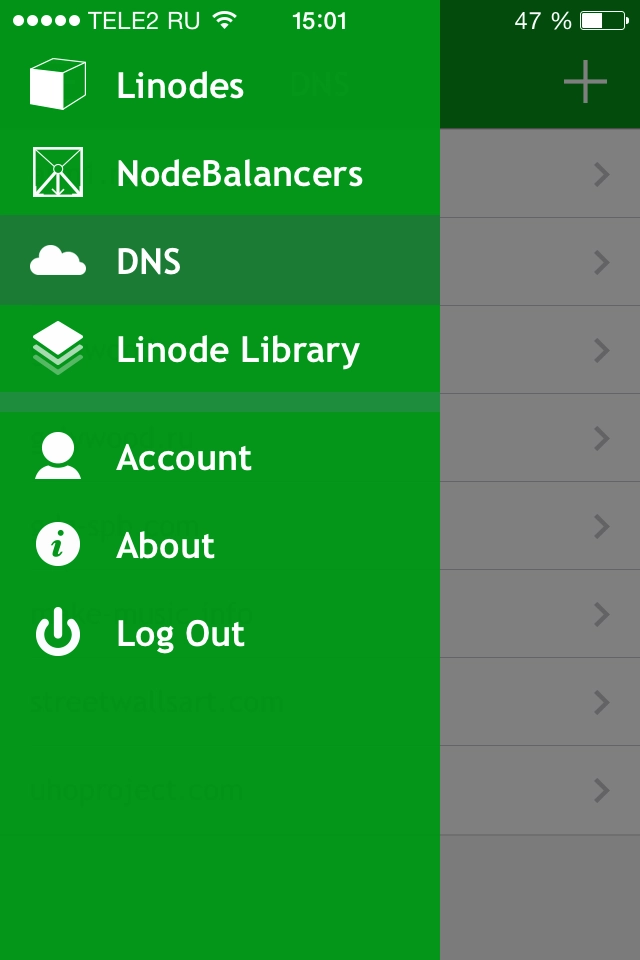
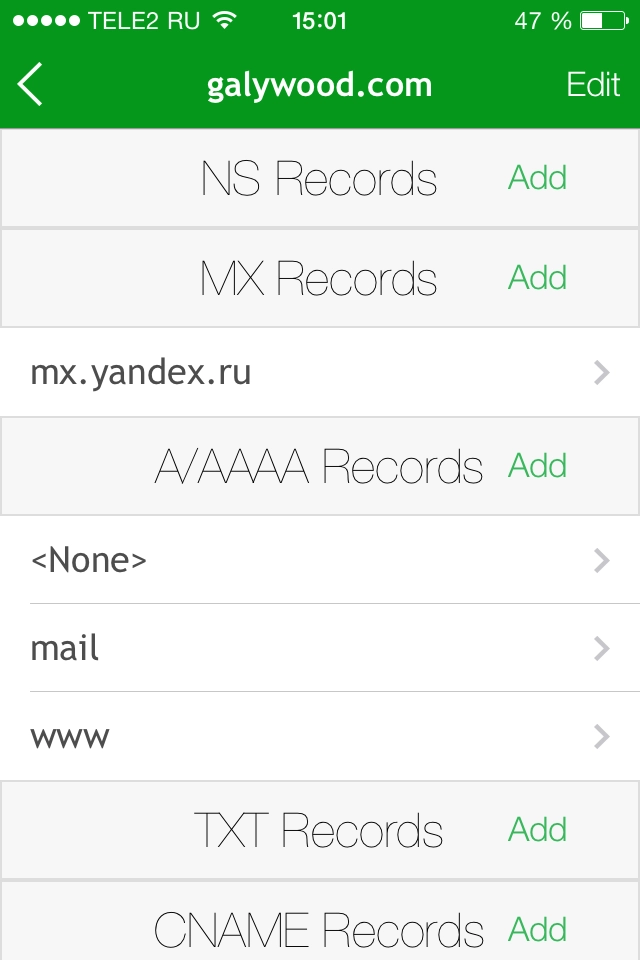
There is a left-side menu with items like these. From the client you can manage DNS records, for example.
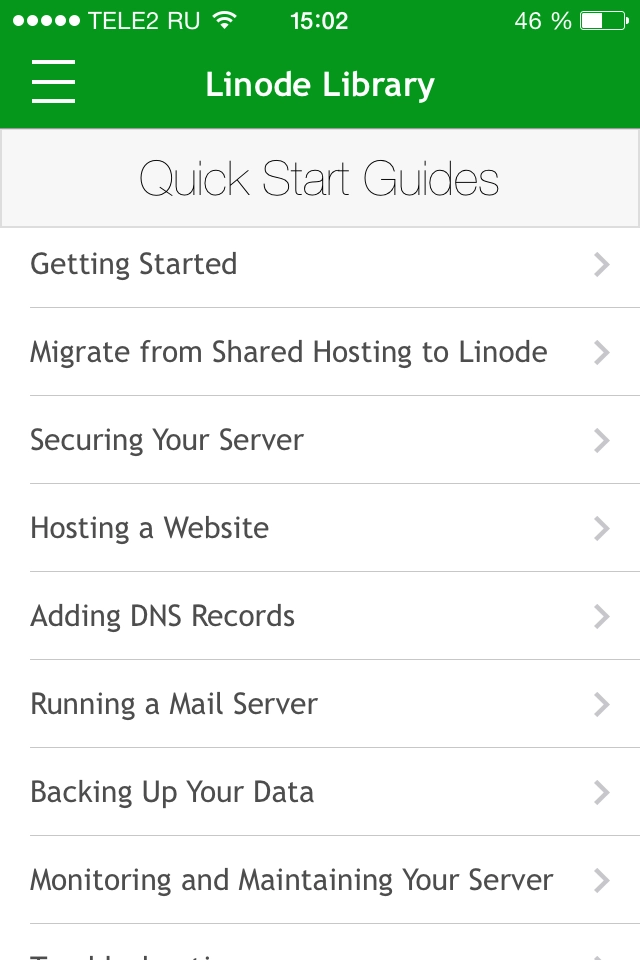
There is also access to their knowledge base.
A list of articles by topic; the article itself opens in the built-in browser. The knowledge base is not offline, of course, but overall it is a useful thing (probably). In any case, it will not hurt.
And the final items in the left-side menu are balance, traffic quota statistics, and even the ability to enter a new credit card. In the About section you can call technical support.
The app looks non-native and probably written in something like PhoneGap, but it is still useful. Must have if you host on Linode.
Writing a Yandex.Metrica Client for iPhone

A copy of my article from Habr
Examples of creating charts with PNChart are available on the project's GitHub page. Application registration is straightforward: add the application and select the permissions it wants to request. During authorization, the user will be able to allow or deny access to the data and will also see which permissions the app is asking for.
OAuth authorization
Personally, it annoys me a bit when you install an unofficial client for some service and it asks you to enter your login and password into its own form. Who knows where they go after that. To me, the authorization flow looks much more transparent when a browser window pops up and authorizes on the service's website.
Technically, OAuth authorization is quite simple: add a custom URL scheme to the app (for example, myapp), specify something like myapp:// as the Callback URI in the Yandex application settings (where you registered the app), and then write the code so that after authorization the application tries to open the URL at myapp://. That way the URL opens in our application, and it already contains all the data, including the access_token.
There is an excellent article on Habr about exactly this kind of authorization and specifically for Yandex, and it saved me time, so I will not describe authorization in more detail to avoid repeating it. After authorization we have a token, and that is what we will store.
Technical nuance: at some point the user will logically want to log out of the app — so nobody else can access the statistics, or, for example, to sign in with another account. With browser-based authorization (that is, through UIWebView), it is not enough to delete the token you obtained earlier. Authorization inside UIWebView is remembered, so when logging the user out you need to clear the cookies in the app sandbox, otherwise you will automatically sign back into the same account during authorization. In my case, this simple code was enough:
NSHTTPCookie *cookie;
NSHTTPCookieStorage *storage = [NSHTTPCookieStorage sharedHTTPCookieStorage];
for (cookie in [storage cookies]) {
[storage deleteCookie:cookie];
}
[NSUserDefaults standardUserDefaults] synchronize];
Saving the token
An important point for paranoids is storing the token you receive. You can, of course, put it into NSUserDefaults, but people say that if, for example, there is a jailbreak, that is not secure and the token can be extracted. A good practice is to store access keys, logins, and other important things in KeyChain; everything there is encrypted and secure.
When you dig into it for the first time, even with articles in your native language, it makes you want to bang your head against something. You really do not want to dig into all of that when all you need is to save n characters and later read them back. For lazy people like me, Apple included the KeychainItemWrapper class in the documentation. The name speaks for itself — it is a wrapper around KeyChain. The class is old and does not support ARC, but on GitHub it is easy to find a fork with ARC support. This one, for example (you can even add it through CocoaPods).
And now saving and deleting the token comes down to just a few lines:
// сохранение
KeychainItemWrapper *keychainWrapper = [[KeychainItemWrapper alloc] initWithIdentifier:@"OAuthToken" accessGroup:nil];
[keychainWrapper setObject:@"accountName" forKey:(__bridge id)(kSecAttrAccount)];
[keychainWrapper setObject:tokenToSave forKey:(__bridge id)(kSecValueData)];
// удаление
KeychainItemWrapper *keychainWrapper = [[KeychainItemWrapper alloc] initWithIdentifier:@"OAuthToken" accessGroup:nil];
[keychainWrapper resetKeychainItem];
Retrieving data
Personally, I prefer getting data in JSON. Requests are simple enough: send the required request to the API method and include Authorization: OAuth <access_token> in the header. By the way, you can also pass the token as a GET parameter, for example:
https://api-metrika.yandex.ru/counters?oauth_token=ACCESS_TOKEN
Since we have been paranoid about security from the very beginning, all requests can be sent over https (though http also works). We get JSON data and parse it with the built-in NSJSONSerialization:
dataObject = [NSJSONSerialization JSONObjectWithData:result options:NSJSONReadingMutableContainers error:&e];
The result for getting the list of counters, for example:

Then all that remains is to display the received data somehow.
Display
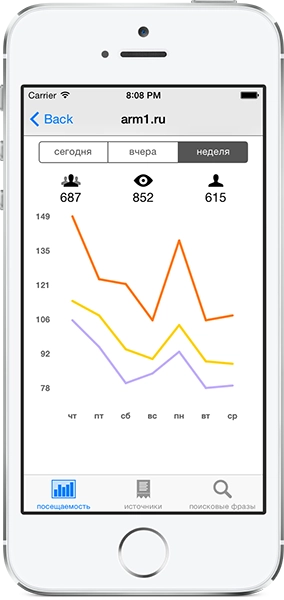
If you look at the web interface of Metrica, there are mainly two ways the data is presented: tables with textual data and charts.
Tables are fairly straightforward — use UITableView. Almost all data includes the same common metrics: page views, visits, unique visitors, page depth, time on site, and bounce rate. So I made a subclass of UITableViewCell to avoid duplicating a lot of identical code in each UIViewController. After that, in the method
- (UITableViewCell *)tableView:(UITableView *)tableView cellForRowAtIndexPath:(NSIndexPath *)indexPath
we simply create a cell with the data we have already received, for example:
NSString *CellIdentifier = [NSString stringWithFormat:@"CellId_%li_%li", (long)indexPath.section, (long)indexPath.row];
SourcesTableViewCell *cell = [tableView dequeueReusableCellWithIdentifier:CellIdentifier];
if ( cell == nil ) {
cell = [[SourcesTableViewCell alloc] initWithStyle:UITableViewCellStyleDefault reuseIdentifier:CellIdentifier
textOnLabel:@"просмотры" labelTextColor:[UIColor black]];
}
// задаём значения
[cell
changeValuesWithpageViewsNum:pageViewsNum
visitTime:visitTime
denials:denialsValue
visitsNum:visitsNum
];
Time spent on the site, by the way, is returned in seconds, so it still has to be formatted nicely as mm:ss, and bounce rate is returned as a value from 0 to 1, so 50% comes back as 0.5.
There are several ready-made solutions for drawing charts. Some of them can, again, be found on Habr. On GitHub, I personally liked PNChart — minimalistic and nice. Hook it up through CocoaPods and off you go.
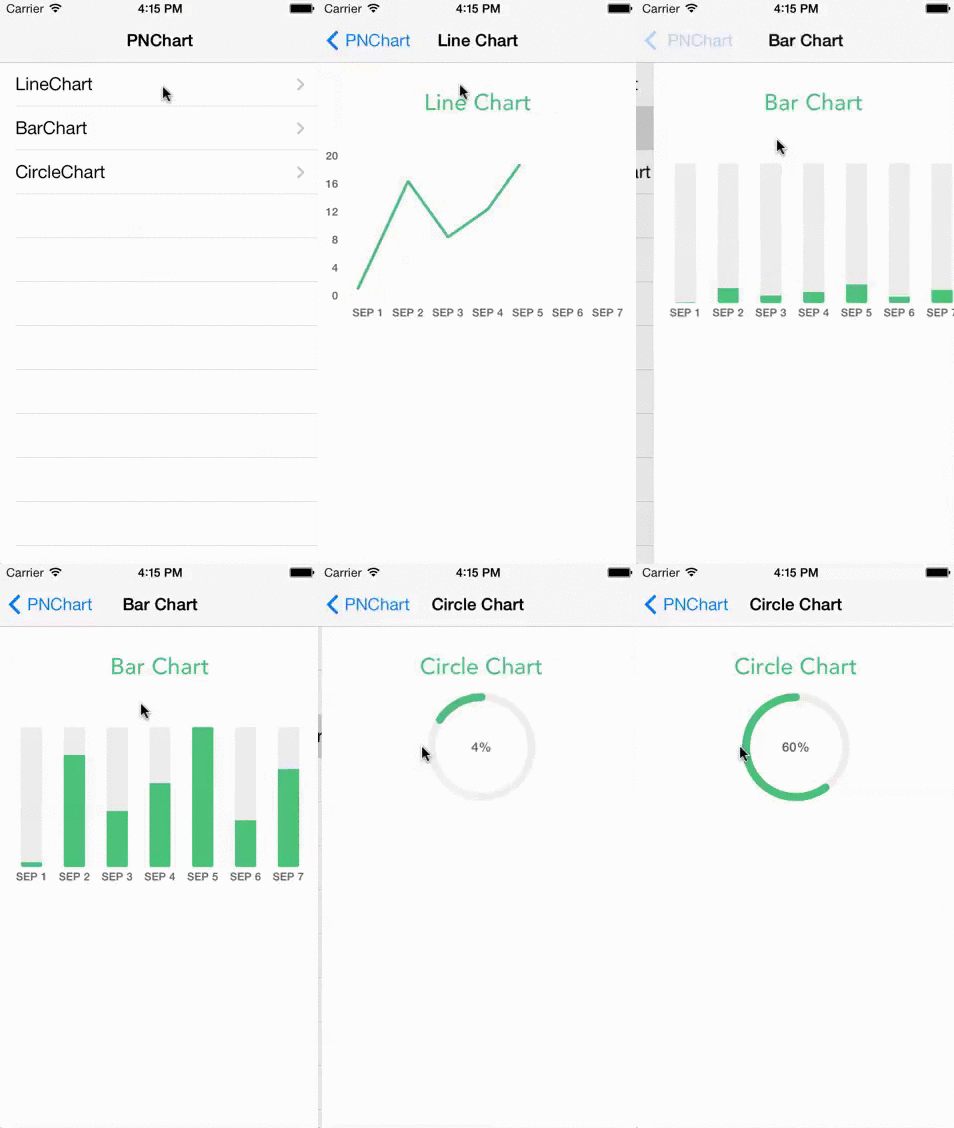
Examples of creating charts with PNChart are available on the project's GitHub page.
Compose everything into a UITabsViewController, add a bit of styling, and you get quick statistics in your pocket.
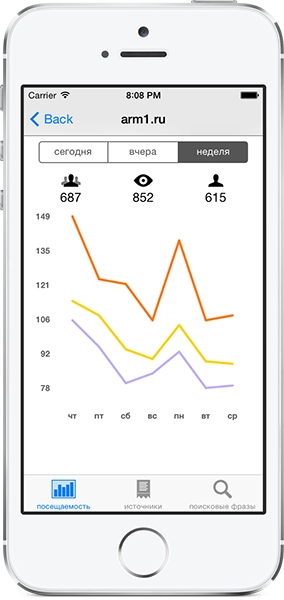
To motivate myself to keep developing it, I made the app paid.
Useful links:
CocoaPods — a powerful tool in the hands of an Objective-C developer
Yandex OAuth authorization in iOS
PNChart (chart drawing)
KeychainItemWrapper (a wrapper around KeyChain)
iMetrik 1.1 Update
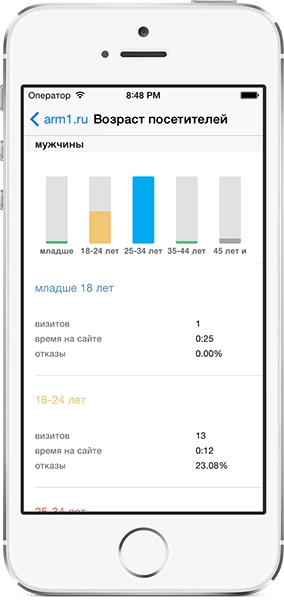
Today the iMetrik update was released. The main additions are the Visitors tab with reports by gender, age, and geography, and the Goals tab, which contains all the same reports but for goals and with additional parameters such as goal achievement, conversion, and more.
Also fixed a couple of issues.
iSubscriptions — Yandex.Subscriptions Client for iPad
I had wanted to write this app for a long time. Strangely enough, in the eight months since Yandex opened the API for Yandex.Subscriptions after Google Reader was shut down, not a single iOS client had appeared. And I wanted such an app for myself as well. I started reading news at home with a cup of tea, then continued on the road on my iPad — everything I had already read was marked as read, beautiful. And in general it is simply more convenient for me to read news on the iPad. Somehow the web version of Subscriptions does not work particularly fast.
In the app you can not only read news and share it on social networks or add it to Safari Reading List, but also manage subscriptions — add new feeds and remove the ones already added.
If there is no app, write it yourself :) The app is free.
iMetrik — Yandex.Metrica Client for iPhone
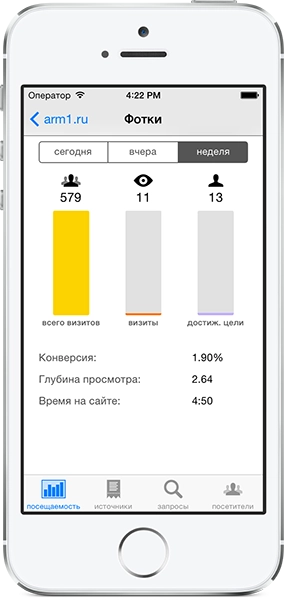
I released a mobile client for Yandex.Metrica for iPhone. The first version can do the following:
- traffic summary (visits, page views, visitors);
- daily traffic chart;
- report on traffic sources to your site;
- report on traffic from search engines;
- report on traffic from other websites;
- report on search phrases visitors used to find your site;
- display the list of your counters.
AllCafe for iPhone Featured in the “All About Moscow” Section of the App Store
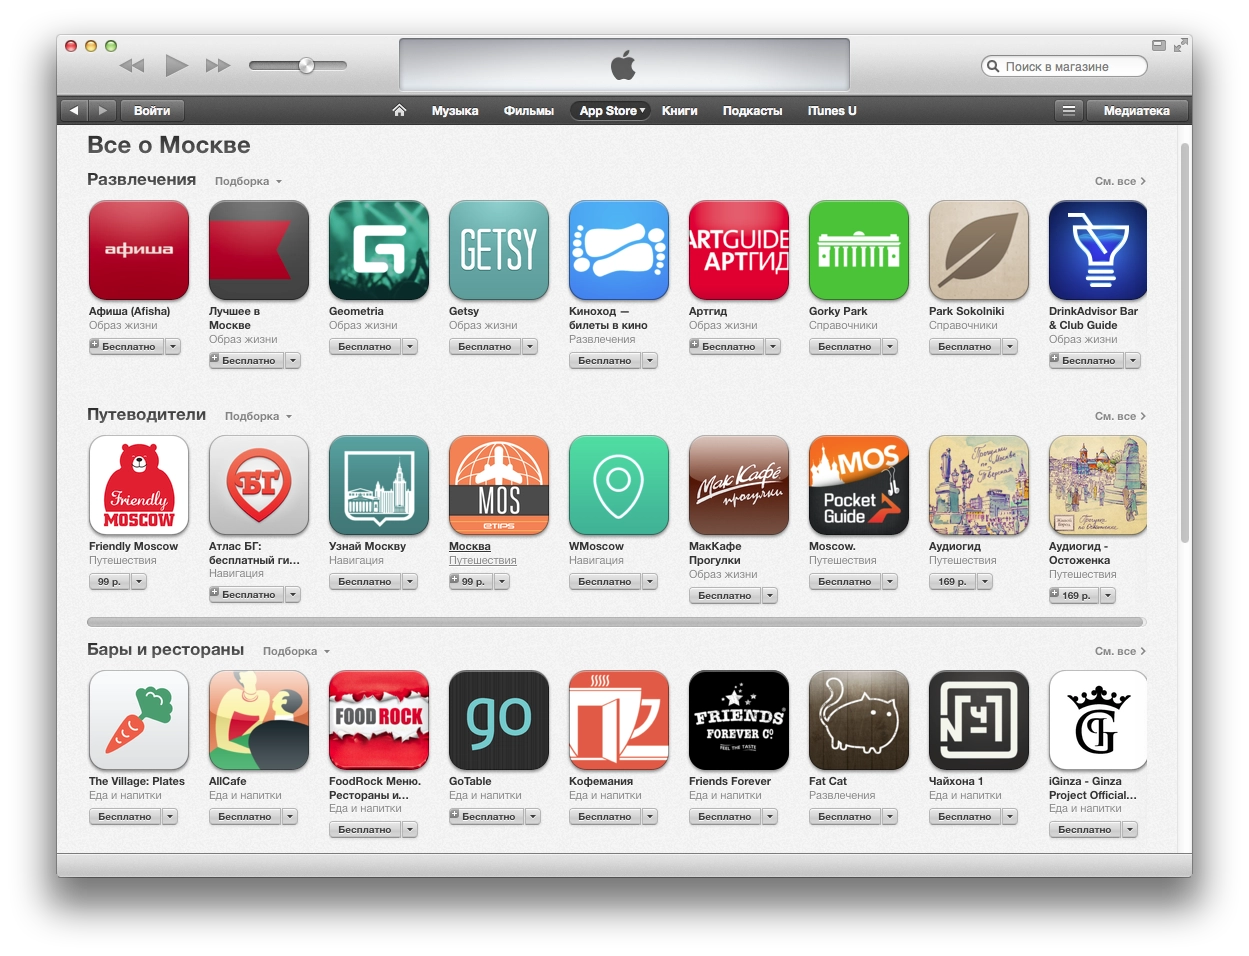
A small thing, but nice. A separate “All About Moscow” collection appeared in the Russian App Store, and an app I wrote made it into it.
This Day 2.0
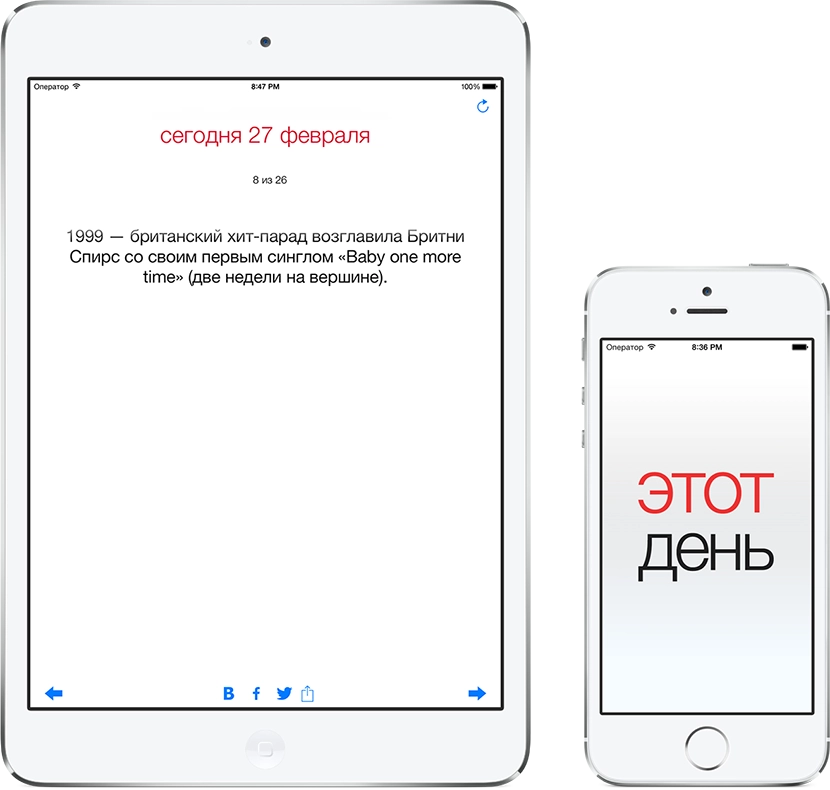
I released an update for the This Day app. I redesigned it for iOS 7 (which is roughly the same as removing almost all styling altogether). In my opinion it became nicer and more concise.
I used the standard UIActivityViewController for sharing via Facebook, Twitter, and other built-in options such as email, sms/iMessage, etc., and I also added Vkontakte-iOS-SDK for sharing to VK instead of the homemade thing that had been there before. True, there are not really any visual differences for the user, and by the time I finally got around to polishing everything, VK had already released an official iOS SDK, but I did not want to dig into it just to replace something that was already working.
At the same time I got rid of the now unnecessary SBJson for working with JSON, because you can safely use the NSJSONSerialization already built into iOS. I decided to add Yandex.Metrica Mobile to the app to count users properly and see, for example, who uses which iOS version and on what device. For now I am just watching the numbers; it is informative.
This is how the little hobby project continues. I will think about what else to build into it, and then I will write the next app. For now — download/update:
Detecting When the Map Stops in Google Maps SDK for iOS
An addition to this post. There I mentioned among the problems that Google Maps only provides the event mapView: didChangeCameraPosition:, which fires at every tiny movement of the map, even while the finger is still on the screen. If you move your finger slowly across the map and some markers are supposed to appear via external HTTP requests, it manages to send 10-15 requests per second. That is of course unacceptable, especially on mobile internet.
But you can handle this yourself, more specifically with UIPanGestureRecognizer.
Code cheat sheet:
// где-то в коде проекта
panRecognizer = [[UIPanGestureRecognizer alloc] initWithTarget:self action:@selector(mapDidChange:)];
[panRecognizer setMinimumNumberOfTouches:1];
[panRecognizer setMaximumNumberOfTouches:1];
// GoogleMapsView это гуглокарта, класс GMSMapView
GoogleMapsView.gestureRecognizers = @[panRecognizer];
//.. метод, реагирующий на отпускание касания
-(void)mapDidChange:(UIPanGestureRecognizer *)pan {
if ( panRecognizer.state == UIGestureRecognizerStateBegan ) {
// ничего не делать, но можно и что-нибудь делать
}
if ( panRecognizer.state == UIGestureRecognizerStateEnded ) {
// палец отпущен, можно делать то, что нужно, например:
[self sendMapRequest];
}
}
That is it: you attach the gesture recognizer to the Google map. When the finger is released, you perform the required actions. Theoretically this can even replace mapView: didChangeCameraPosition: if needed.
Replacing UIDevice uniqueIdentifier
Since uniqueIdentifier is now deprecated (back from the iOS 5 days) and Apple no longer accepts apps that use this method (the latest Xcode, it seems, does not even build a project that uses this function).
I googled what to replace it with and assembled one solution from several different ones:
NSString *uuid = @"";
if ([[UIDevice currentDevice] respondsToSelector:@selector(identifierForVendor)]) {
// This is will run if it is iOS6 or later
uuid = [[[UIDevice currentDevice] identifierForVendor] UUIDString];
} else {
NSUserDefaults *defaults = [NSUserDefaults standardUserDefaults];
id uuidId = [defaults objectForKey:@"deviceUuid"];
if (uuidId)
uuid = (NSString *)uuidId;
else {
// Create universally unique identifier (object)
CFUUIDRef uuidObject = CFUUIDCreate(kCFAllocatorDefault);
// Get the string representation of CFUUID object.
uuid = (__bridge_transfer NSString *)CFUUIDCreateString(kCFAllocatorDefault, uuidObject);
CFRelease(uuidObject);
[defaults setObject:uuid forKey:@"deviceUuid"];
}
}
Apple now suggests using the identifierForVendor method. This identifier will be unique for each device, but the same across all of your apps on that device. That is, if you install 2 apps from one vendor on the same phone, this id will be the same in both apps. It appeared in iOS 6 and, as far as I understood, on iOS 6 it changes if the app is deleted and installed again. In iOS 7, judging by what people write, it will already be tied to the MAC address and will always stay the same.
The identifierForVendor method had a bug in iOS 6.0: on devices updated over the air it returned a value full of zeros. In 6.0.1 and later that was fixed.
identifierForVendor appeared only in iOS 6, so if you support iOS 5 you need something else. This is where CFUUIDCreate comes in handy. An ID created with it will also change after the app is removed and installed again if you store it somewhere like NSUserDefaults, as in the code above. If you store it in KeyChain, you can avoid it changing after installation. Although how necessary that is is not very clear to me personally. But once generated, the identifier has to be stored somewhere, otherwise this code will generate a different one every time.
That is the cheat sheet.
Using Google Maps SDK for iOS
In December, Google released an SDK for embedding its maps into iOS apps. Over the last few days I have been tinkering with it, trying to integrate it into my project. Here is a short description of how to embed it.
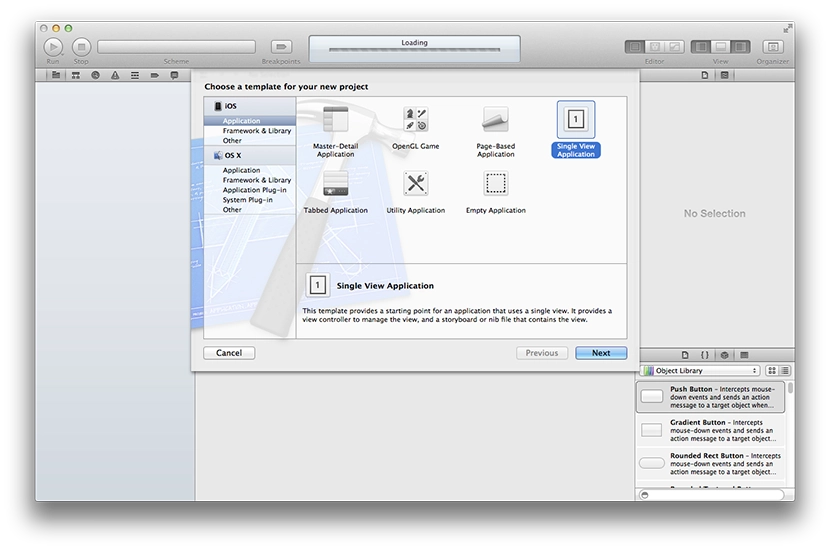
Let's create a new app.
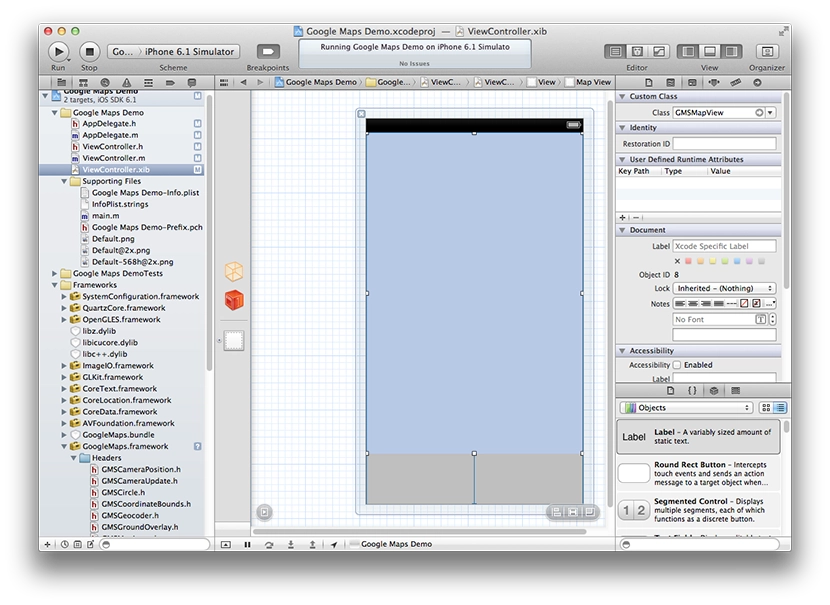
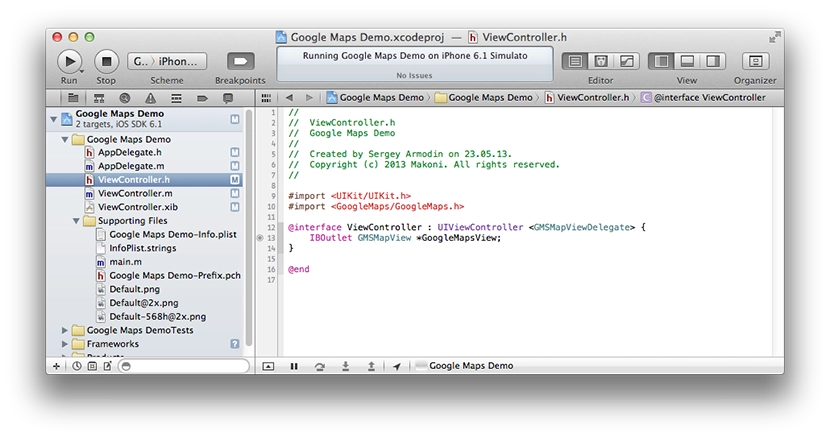
Add a new UIView to the screen. Connect our UIView to the code via IBOutlet. Also, in the settings on the right panel, set its class to GMSMapView. You need to set this class so that Google Maps can be embedded into your view on the screen, instead of simply replacing self.view with Google Maps and getting a full-screen map.
Importing the SDK into the project is quite simple. Here is a detailed step-by-step guide from Google, only in Russian:
- Create a new project in Google APIs Console.
- Select the Services section in your API project, enable Google Maps SDK for iOS, and accept the terms of use.
- Select API Access and click Create new iOS key.
- Enter one or more bundle identifiers from your app's .plist file, in the form com.example.myapp. In my case it is makoni.Google-Maps-Demo.
- Click Create.
- On the API Access page, find the Key for iOS apps section (with the identifiers of our apps) and you will see a 40-character API-key. That is what we need for it to work.
Next, you need to add the SDK itself to the project. Judging by the description on Google's site, their map does not work with Storyboards and requires ARC (Auto Reference Counting) to be enabled.
- Drag GoogleMaps.framework from the downloaded and unpacked SDK into the project's Frameworks group. When prompted, check Copy items into destination group's folder.
- Right-click GoogleMaps.framework inside the project and choose Show in Finder.
- In the opened folder, drag GoogleMaps.bundle from the Resources folder into our project (they also recommend dragging it into the Frameworks group). When prompted, this time uncheck Copy items into destination group's folder.
- Select our project and open the target section.

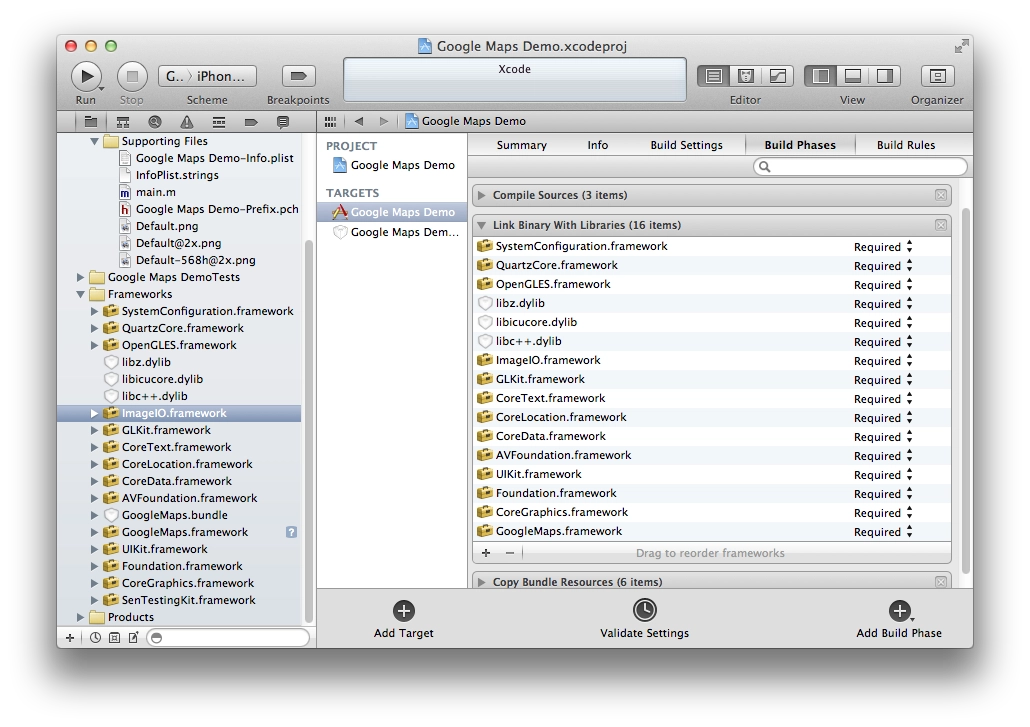
On the Build Phases tab, add the following frameworks under Link Binary with Libraries:- AVFoundation.framework
- CoreData.framework
- CoreLocation.framework
- CoreText.framework
- GLKit.framework
- ImageIO.framework
- libc++.dylib
- libicucore.dylib
- libz.dylib
- OpenGLES.framework
- QuartzCore.framework
- SystemConfiguration.framework
- On the Build Settings tab, the Architectures value must be armv7. In the Other Linker Flags section, add -ObjC.
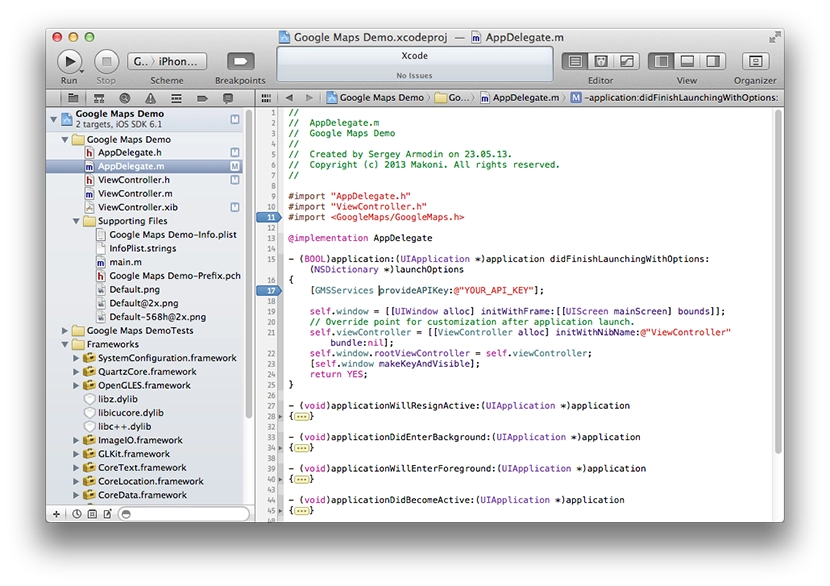
- In AppDelegate, all that remains is to add the line #import <GoogleMaps/GoogleMaps.h> and add the line [GMSServices provideAPIKey:@"YOUR_API_KEY"]; to the application:didFinishLaunchingWithOptions: method, replacing YOUR_API_KEY with your own 40-character API key.

That's it, Google Maps has been imported into the project. You can start using it.
The documentation for the GMSMapViewDelegate protocol gives a rough idea of what you can do with the maps. At the time of writing this post, the latest version of Google Maps for iOS is 1.3.0 (May 2013).
In short, you can detect map movement (camera changes), a tap on the map, a long press on the map, a tap on a marker, a tap on a marker's info window, a tap on an overlay, and you can also provide your own info window when the user taps a marker.
You can show the built-in button for the user's location and the compass button on the map.
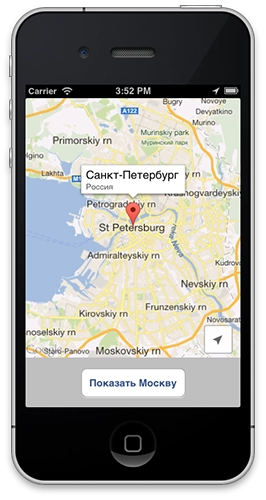
I made a simple example where a map opens with a marker in St. Petersburg, and the «Show Moscow» button jumps to Moscow and places a marker there. Also, if you keep tapping some point on the map, a marker will appear there. I don't see much point in describing everything here, it is easier to look at the sample code.
Google's map is much more detailed than Apple's maps, where there are no buildings at all, which makes them unsuitable for apps that need to show a specific address and location.
At work, I did almost everything I needed with Google Maps — I had to load new data from the server whenever the map changed and display them as markers on the map. But I still could not implement everything I needed at that point.
Problems I ran into:
- when the map (camera) changes, the mapView:didChangeCameraPosition: event fires several times. That is, while the user is moving the map with a finger, it keeps firing all the time. As a result, my app constantly sends requests to the server; in the simulator it manages to send 5–6 requests per second. Under mobile internet conditions this is an unreasonable waste of traffic, and on top of that the map simply starts lagging because of so many asynchronous requests. There is no way to detect that the map has not just changed, but that the user has finished moving it. Unless you try to track manually whether the user has lifted a finger from the screen. In my opinion this is just awful.
UPDATE: there is a solution for this problem. - You cannot catch the standard My Location button. In the app I am writing, pressing it should clear the markers on the map, because the user may have moved to another part of the city and old markers are no longer needed, and they also consume memory. To do that, I will have to add my own button.
-
Apparently, the info window that opens when you tap a marker on the map is rendered as an image. In other words, you can only set the title and description text in it. Unfortunately, there is no other way to customize it. If you want to change anything, you will have to draw a completely custom window with all the styling, by implementing the method
.- (UIView *)mapView:(GMSMapView *)mapView markerInfoWindow:(id<GMSMarker> *)marker
I hope these issues will be fixed in future SDK versions.
You can download the sample on GitHub. Just don't forget to set your API key in the AppDelegate.m file in the line [GMSServices provideAPIKey:@""], otherwise the maps will not work.
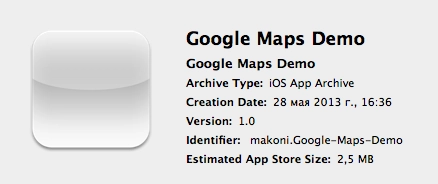
By the way, the app size with Google Maps SDK seems acceptable. The sample size is 2.5 megabytes.

Peace.
Escaping image URLs with Russian filenames in Objective-C
Management at the office started uploading images with Russian filenames into news on the portal — things like Фото-Ресторана.jpg.
Images from news items are shown inside the app, so the app fetches them by these URLs.
The URL arrives in the app already percent-encoded, e.g.:
http://allcafe.ru/s/pic/news/!_2012/2012_12/%D0%A0%D0%B5%D1%81%D1%82%D0%BE%D1%80%D0%B0%D0%BD-Graf-in-%D0%A1%D0%B0%D0%BD%D0%BA%D1%82-%D0%9F%D0%B5%D1%82%D0%B5%D1%80%D0%B1%D1%83%D1%80%D0%B3-%D0%B7%D0%B8%D0%BC%D0%BD%D1%8F%D1%8F-%D1%82%D0%B5%D1%80%D1%80%D0%B0%D1%81%D0%B0.jpg
The app uses a class called AsynchronousUIImage that I found online about a year ago. It just loads the image asynchronously via NSURLConnection.
- (void)loadImageFromURL:(NSString *)anUrl {
anUrl = [anUrl stringByAddingPercentEscapesUsingEncoding: NSUTF8StringEncoding];
NSURLRequest *request = [NSURLRequest requestWithURL:[NSURL URLWithString:anUrl]
cachePolicy:NSURLRequestReturnCacheDataElseLoad
timeoutInterval:30.0
];
connection = [[NSURLConnection alloc] initWithRequest:request delegate:self];
}
The catch turned out to be in stringByAddingPercentEscapesUsingEncoding. Since the URLs come in already percent-encoded, it looks like double-encoding was happening and the image simply wouldn’t load. And if the NSURLConnectionDelegate method connection:didFailWithError: isn’t implemented, you get a crash — which is what hit me.
The funny conclusion: if you have URLs containing Cyrillic characters, you have to escape them either on the server before sending them to the client, or in the client. Doing it in both places — doesn’t work. Doing it nowhere — also doesn’t work :)
Luckily I fixed it on the server side without breaking anything and avoided shipping an emergency client update. By the way, on Android there is no such problem.
Optimising an iOS app for the iPhone 5 screen
-
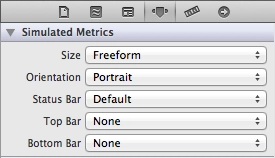
For the xib files of your View, set Size: Freeform. The interface will then stretch to the full height of the screen. If you need full control, you can set the view size for either the 3.5" or the 4" screen and switch programmatically.
-
The most important thing — add a launch image for the 4" screen. Without it, the app for some reason thinks the screen is small. And yes, if you weren’t using a launch image at all before, looks like you’ll have to start now.
I haven’t tried this with Storyboard yet. And one more small handy trick — if you need to detect in code whether the screen is wide or regular, you can define this in prefix.pch:
#define IS_WIDESCREEN ( fabs( ( double )[ [ UIScreen mainScreen ] bounds ].size.height - ( double )568 ) < DBL_EPSILON )
and then check it in code:
if ( IS_WIDESCREEN == YES ) {
// use the 4" interface
} else {
// use the 3.5" interface
}
«This Day» app is now also for iPhone
Finally finished updating the «This Day» app so that it now installs not just on iPad, but on iPhone as well.
This Day for iPad 1.1

Version 1.1 of This Day for iPad has been released. At first I wanted to add swipe navigation for events and fix a few small things, but somehow it dragged on. When I finally coded it, I had to reject the app from the App Store 2 or 3 times because I kept finding nasty bugs that made it crash or display incorrectly. By the time I had fixed everything critical, the new iPad had come out, so I added graphics for it right after that. And at the very end I discovered that sharing to VK requires a captcha, so I had to google it and implement its handling.
So in the end, what started as small changes turned into a pretty substantial changelog for such an app:
- support for iPad with Retina display;
- events can now be swiped with a finger;
- when publishing an event to Facebook or VKontakte, the app now shows a notification that the publication succeeded;
- when publishing events to Facebook or VKontakte, they are now posted in a more understandable form with the full date;
- captcha handling for posting to VKontakte added;
- fixed a bug that prevented long events from being published;
- minor improvements and bug fixes.
AllCafe for iPhone 2.0
![]()
AllCafe for iPhone 2.0 has been released.
What is new in version 2.0
- New restaurant info layout;
- viewing restaurant photos;
- new restaurant news layout;
- viewing photos attached to news items;
- new restaurant review layout;
- viewing photos in a review and all photos from all visitor reviews;
- restaurant magazines added;
- various fixes and additions.
Screenshots of the new features:


How to detect a Retina Display on iPad/iPhone
Note! If you just need to figure out what kind of screen your iPad, iPhone, or iPod has, simply follow this link: https://arm1.ru/retina/
While trying to figure out how to detect the presence of a Retina display on a device in Objective-C, I had to do some googling. I found this solution and am writing it down here as a cheat sheet.
Get the screen bounds:
CGRect screenBounds = [[UIScreen mainScreen] bounds];
It returns the screen size, usually 320x480; even on iPhone 4, iPhone 4S, and iPod Touch it will still return 320x480 (apparently because old apps would otherwise crash). For iPad it returns 768x1024 — both on iPad/iPad 2 and on the new iPad with Retina Display.
Get the screen scale:
CGFloat screenScale = [[UIScreen mainScreen] scale];
It returns 1.0f for all non-Retina screens. It returns 2.0f for Retina screens. This applies to all iOS devices.
So, having screen dimensions characteristic of the form factor (phone/iPod or tablet) and knowing the scale, we can calculate the device’s actual screen size:
CGSize screenSize = CGSizeMake(screenBounds.size.width * screenScale, screenBounds.size.height * screenScale);
If you run code like this:
CGRect screenBounds = [[UIScreen mainScreen] bounds];
NSLog(@"%f x %f", screenBounds.size.width, screenBounds.size.height);
CGFloat screenScale = [[UIScreen mainScreen] scale];
NSLog(@"%f", screenScale);
CGSize screenSize = CGSizeMake(screenBounds.size.width * screenScale, screenBounds.size.height * screenScale);
NSLog(@"%f x %f", screenSize.width, screenSize.height);
then you will see all dimensions in the console. In this case, I ran it on the iPad Retina simulator:

And then, by checking the dimensions/device type, you can substitute the required graphics at the required sizes. Profit.
P.S. As for images, you only need to create 2 files: for example, "image.png" and the same image at double size named "image@2x.png", and then use only the first one. For example:
[UIImage imageNamed:@"image.png"];
If the device has Retina, the app will automatically pick up the higher-resolution file (image@2x.png).
A Useful Thing: Prefix.pch
I discovered a useful thing in iOS development: the Prefix.pch file, a Precompiled Header.
From the description, Precompiled Headers are compiled, cached, and then automatically included into every file being compiled. So if there is some class that is needed everywhere or almost everywhere in a project, you can include that class inside the Prefix.pch file, which is created automatically in a new project, and it will be available everywhere. I really didn't like having to include the same class again and again in every View Controller when it was needed almost everywhere.
They also say that including files in Prefix.pch speeds up compilation later, once it and all files included in it have already been compiled once. But when you change the Precompiled Headers or the files included in them, compilation time goes up instead. So it's better to include code there that changes rarely.
It's also a good place to declare constants. That way they will also be available throughout the whole project. I don't like including a constants file everywhere either.
The automatically created AppName-Prefix.pch already contains so-called Preprocessor Macros. Here is an example of such a file:
#import <Availability.h>
#ifndef __IPHONE_3_0
#warning "This project uses features only available in iPhone SDK 3.0 and later."
#endif
#ifdef __OBJC__
#import <UIKit/UIKit.h>
#import <Foundation/Foundation.h>
#import "YourEverywhereNeededClass.h"
#endif
#ifdef DEBUG
#define DLog(...) NSLog(@"%s:%i %@", __PRETTY_FUNCTION__, __LINE__, [NSString stringWithFormat:__VA_ARGS__])
#define DescLog(...) NSLog( @"%@", __VA_ARGS__ )
#endif
#define kNameOfConstant @"Constant Value"
Line 10 imports a file that is needed throughout the project.
Line 14 creates a custom function that prints the passed value, first showing which class, which method, and which line it was called from. For example, DLog( @"arm1.ru" ) will print:
-[SecondViewController viewWillAppear:]:84 arm1.ru
Class SecondViewController, method viewWillAppear, line 84, value "arm1.ru".
Line 15 is simply a convenient function: for example, to print values in an array to the console you normally had to write NSLog(@"%@", array) or NSLog( [array description] ). It's long and clumsy; much nicer when everything is short.
Line 18 defines a constant.
All in all, it's a very useful thing.
Boosting iPhone 4 volume

I have a French iPhone 4. Apple is required to cap headphone volume on phones sold in France — apparently to look after the citizens’ ears. In the metro that cap leaves me short on volume, and besides, headphones vary — some play louder, some have different impedance and play quieter.
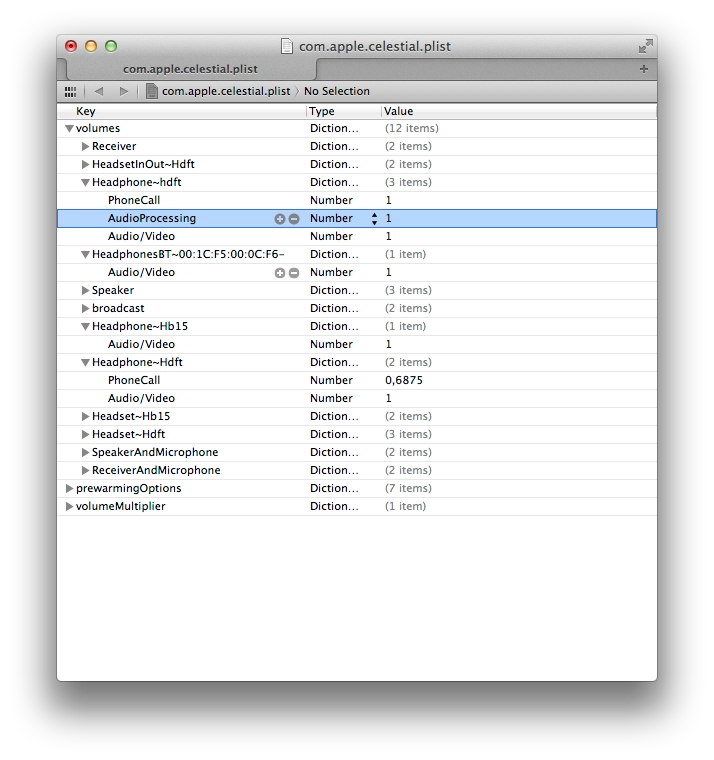
The cap can be bypassed. You need to jailbreak the phone, then access the file system and tweak a couple of plist files. There are plenty of options — installing a Terminal via Cydia, mounting the phone as a drive on your computer, etc. I prefer the second route — installed Phone Disk, it mounted the phone as a volume, and from there I just rummaged through the file system.
- Go to /private/var/mobile/Library/Preferences and edit com.apple.celestial.plist. There I changed the Audio/Video values for the headphones tabs to 1. Note — you can’t save the file directly to the phone, but you can copy it to your computer, change the values, and copy it back. Xcode is fine for editing; if you don’t have it, there are a couple of plist editors floating around online.

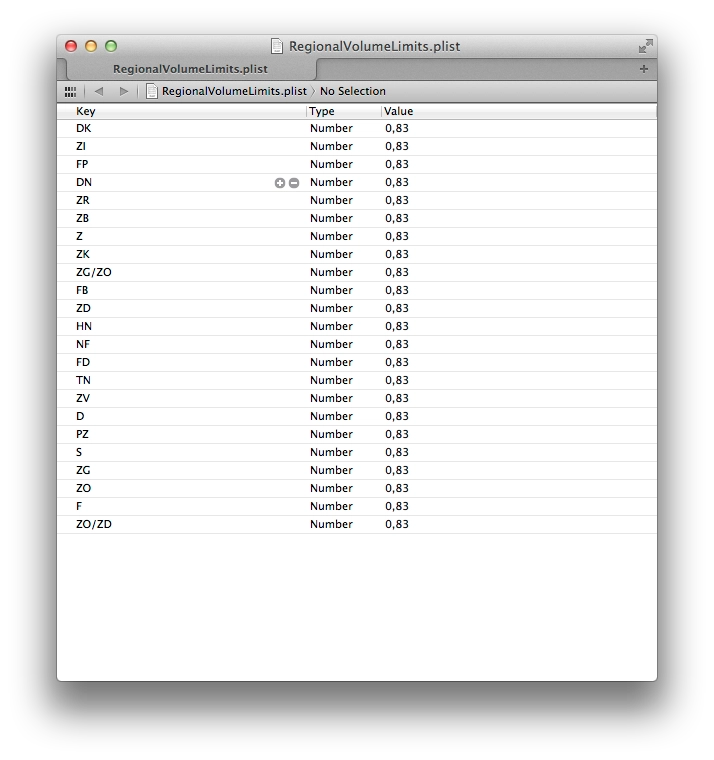
- The next file to edit is RegionalVolumeLimits.plist. On iOS < 5 it lives in /System/Library/PrivateFrameworks/Celestial.framework; on iOS 5 it’s in /System/Library/PrivateFrameworks/MediaToolbox.framework. Inside, there’s a bunch of region codes (most of them meaningless to me), each with a value of 0.83 — meaning the headphone output on the phone is capped at 83%. Change every value to 1, save, replace the file on the phone.

- Reboot the phone (if your jailbreak is tethered or semi-tethered, do «Just Boot» in redsn0w). After the reboot it’ll blast at full volume in your ears.
The only downside — every new iOS update resets these plist files back to defaults. So after every update I have to jailbreak again, edit those two files again, and — what’s starting to wear on me — google the same thing every time, because I keep forgetting which files to edit and where they live. So that’s why I’m just leaving this here, ready at hand :)
AllCafe for iPhone 1.1.2
![]()
Released a small AllCafe for iPhone update. The main changes are iPhone 3G support (i.e. support for the entire iOS 4 line) and image compression on the client side when adding reviews. Photos also get uploaded with the correct orientation now (portrait or landscape).
The pleasant surprise: the update was approved in just one day. Looks like reviewers are working at an accelerated pace right now — even iTunes Connect will be closed for the holidays from December 22 to December 29.
«This Day» for iPad

A friend and I shipped an iPad app called «This Day». First one done — congrats to me. More details…
Embedding the Facebook SDK in an iOS app
A note to self. Instructions on where to download it and how to embed are in Facebook’s docs. Even though they updated the GitHub project recently (November 23 at the time of writing), they still ship an old version of the JSON framework bundled with it. And since my project already uses a newer version of that framework, the app wouldn’t compile.
Fix:
- after adding the SDK to the project, delete the JSON folder from the Facebook SDK;
- in FBRequest.m replace the line #import "JSON.h" with #import "SBJson.h";
-
in the same file, replace
withSBJSON *jsonParser = [[SBJSON new] autorelease]
SBJsonParser *jsonParser = [[SBJsonParser new] autorelease]
Should work.
AllCafe app for iPhone
![]()
We’ve finally finished the first version of AllCafe for iPhone — one we can actually show off.
How many times have you walked into a place only to find there are no free seats — or just realised that today you don’t fancy this place after all? It happens to me a lot. And the first thought is: where else can we sit / eat / have a drink nearby?
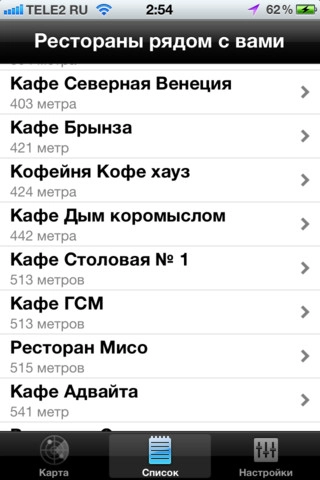
Our portal AllCafe.ru has a fairly large database of restaurants across Russia. Plus user reviews about them. We made an iPhone app — which, by the way, weighs only about 200 KB. With it you can see nearby venues on a map, or as a list with the approximate distance.
For each venue you can see brief info — address, phone number (which you can of course dial straight from the app), what kind of cuisine it serves, read news about the venue, and — important — read reviews and decide whether to go.
You can also leave a review yourself. Sitting happily (or unhappily) in a restaurant — open the app and add a review.
That’s only what’s in the app right now. The list of planned features is pretty long and there’s plenty of work ahead.
This is, in fact, my first iOS app. Congrats to me.
Screenshots:
Using UINavigationController together with UITabBarController
Needed to use both UINavigationController and UITabBarController in the same project. Two ways to do it.
Let’s create an empty project. We’ll wire the controllers up by hand. So we have AppDelegate.h and AppDelegate.m.
Approach 1. UINavigationController inside UITabBarController. (via @vox_humana)
In this approach the app always has a Tab Bar — it’s always visible and you can always switch between tabs. Inside one of the tabs (or in all of them, if you like) there’s a view with a UINavigationController, in which you can move between views via push and pop.
Create two new files of type UIViewController subclass (with the «with XIB for user interface» checkbox). Let’s name them FirstViewController and SecondViewController. These will be the two views displayed in the two tabs.
Our AppDelegate.h in the empty project looks like this:
#import <UIKit/UIKit.h>
@interface AppDelegate : UIResponder <UIApplicationDelegate>
@property (strong, nonatomic) UIWindow *window;
@end
We need to add a new @property with a UITabBarController:
#import <UIKit/UIKit.h>
@interface AppDelegate : UIResponder <UIApplicationDelegate>
@property (strong, nonatomic) UIWindow *window;
@property (strong, nonatomic) UITabBarController *tabBarController;
@end
Now over to AppDelegate.m. Here we need to import the FirstViewController and SecondViewController we just created, and add a @synthesize for the tabs:
#import "AppDelegate.h"
#import "FirstViewController.h"
#import "SecondViewController.h"
@implementation AppDelegate
@synthesize window = _window;
@synthesize tabBarController = _tabBarController;
Inside didFinishLaunchingWithOptions we put the following:
- (BOOL)application:(UIApplication *)application didFinishLaunchingWithOptions:(NSDictionary *)launchOptions
{
// create the application window matching the screen size
self.window = [[UIWindow alloc] initWithFrame:[[UIScreen mainScreen] bounds]];
// create two UIViewController instances
UIViewController *viewController1, *viewController2;
// initialise the first view with our first controller’s interface
viewController1 = [[UINavigationController alloc] initWithRootViewController:[[FirstViewController alloc] initWithNibName:@"FirstViewController" bundle:nil]];
// initialise the second view with our second controller’s interface
viewController2 = [[SecondViewController alloc] initWithNibName:@"SecondViewController" bundle:nil];
// hook our views into the tab bar
self.tabBarController = [[UITabBarController alloc] init];
self.tabBarController.viewControllers = [NSArray arrayWithObjects:viewController1, viewController2, nil];
// make tabBarController the app’s root view controller
self.window.rootViewController = self.tabBarController;
[self.window makeKeyAndVisible];
return YES;
}
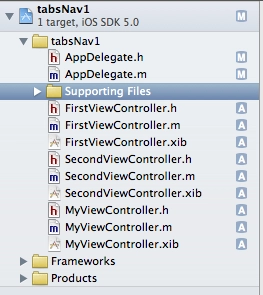
Now on launch we’ll get a tab bar at the bottom of the screen. Each tab will have its controller. The first controller (viewController1) will contain a UINavigationController, which lets us push and pop views. As an example let’s add another UIViewController subclass (with the «with XIB for user interface» checkbox). Let’s call it MyViewController. So the project now has 3 UIViewControllers:

Since viewController1 (a.k.a. FirstViewController) contains a UINavigationController, let’s add some action to it that takes us to our controller. First, at the top of FirstViewController.m add #import "DetailViewController.h", then add a method:
- (IBAction)pushToMyController:(id)sender {
MyViewController * childControl = [[MyViewController alloc] initWithNibName:@"MyViewController" bundle:nil];
[[self navigationController] pushViewController:childControl animated:YES];
}
And of course don’t forget to declare it in FirstViewController.h:
- (IBAction)pushToMyController:(id)sender;
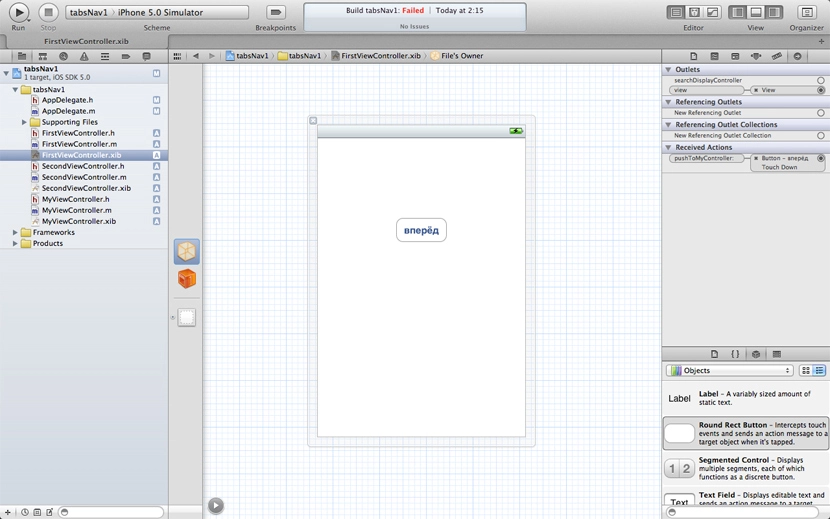
Add a button in FirstViewController.xib and wire it up via the Connection Inspector to our action:

Done. Time to run it. The result looks like this:
The Dropbox iPhone app, for instance, is built on this principle. Download the working example.
Approach 2. UITabBarController inside UINavigationController.
We start by creating a RootViewController. It needs an @property:
@property (nonatomic, retain) IBOutlet UITabBarController *tabBarController;

Add a UITabBarController to the xib, wire it up in Connections Inspector. Create two views in the project — FirstViewController and SecondViewController — and in the UITabBarController inside RootViewController.xib, wire the tabs to those views.
Here’s the start of AppDelegate.m:
#import "AppDelegate.h"
#import "RootViewController.h"
@implementation AppDelegate
@synthesize window = _window;
@synthesize viewController = _viewController;
- (BOOL)application:(UIApplication *)application didFinishLaunchingWithOptions:(NSDictionary *)launchOptions
{
// create the window
self.window = [[UIWindow alloc] initWithFrame:[[UIScreen mainScreen] bounds]];
// create the main controller
self.viewController = [[RootViewController alloc] initWithNibName:@"RootViewController" bundle:nil];
// create the UINavigationController
navigationController = [[UINavigationController alloc] initWithRootViewController:self.viewController];
// make UINavigationController the main controller
self.window.rootViewController = navigationController;
[self.window makeKeyAndVisible];
return YES;
}
The general idea: self.window.rootViewController is a UINavigationController. The app has a RootViewController with its own xib. You can leave it empty, but it needs an @property:
@property (nonatomic, retain) IBOutlet UITabBarController *tabBarController;
When the RootViewController’s view loads, we immediately push our tabBarController. So the first thing the user sees on launch is the tabs and the top bar with a Back button — which you can hide here and show only later somewhere else.
The main upside — inside the views loaded inside the UITabBarController you can navigate the main screen to other views and back, all from code. Video:
The VKontakte iPhone app is built on this principle. My example isn’t implemented perfectly — could be polished — but it works. Download the example.
Will come in handy in the future — and going through it again helped me lock it in.
Mac OS X Lion and iCloud

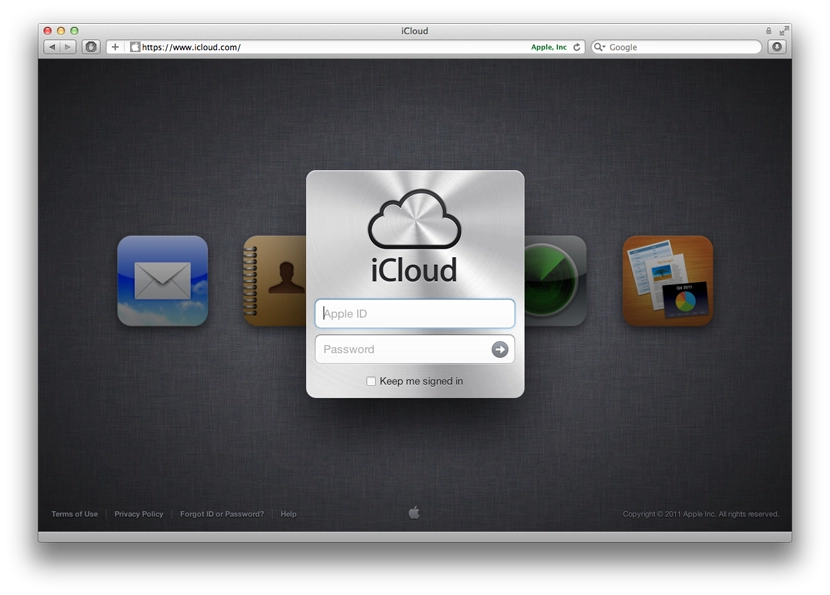
Well, the new macOS with iCloud support is out, and iCloud itself has come out of beta.
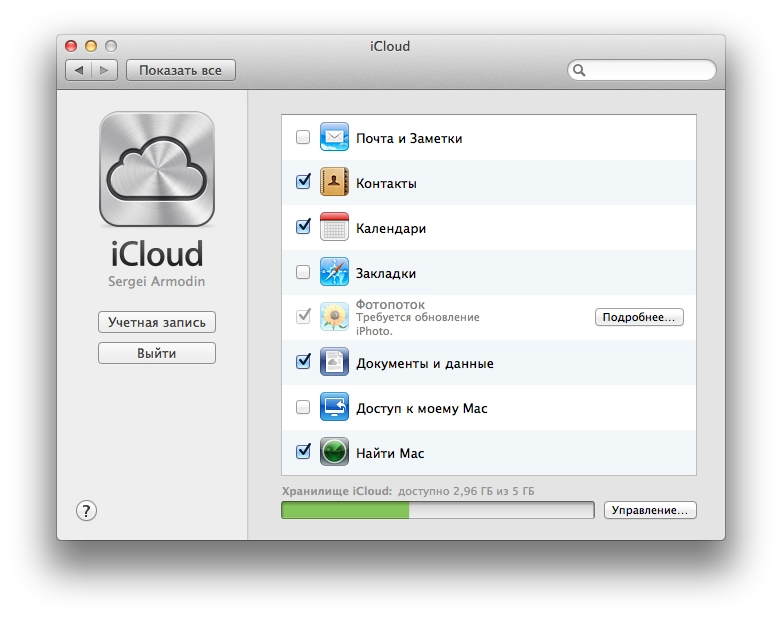
So, after installing the updates, immediately after the system reboots you’re prompted to sign in to iCloud with your Apple ID. After signing in, you’re asked to tick the services you want to use.

I decided not to tick Mail — I don’t really see the point. I already use a mail client on both my computers and my mobile devices. Mail is over IMAP, so it all syncs anyway. Contacts is a relatively useful thing. I personally don’t need it yet, but after turning it on, all the contacts from the address book on the phone showed up on both my Macs.

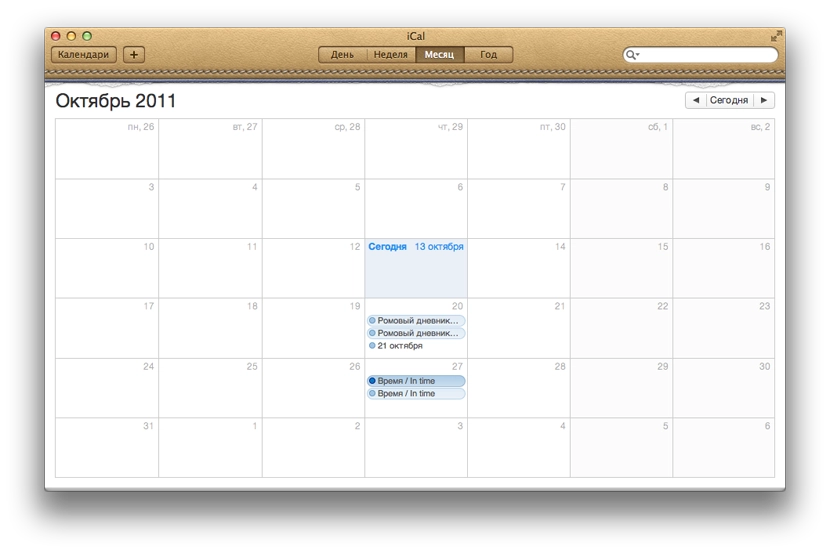
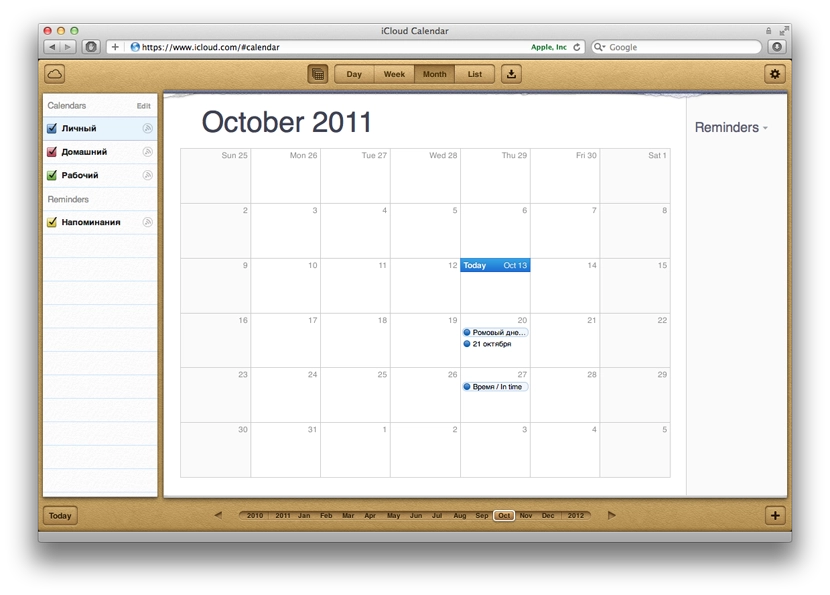
The most useful thing, in my view, is calendar sync. I really didn’t want to bother syncing through Google and keeping a calendar there, especially since the only Google service I use regularly is YouTube. It’s very nice that everything now works and syncs out of the box. For example, I added the dates of film premieres I want to watch. They appeared in the calendars on all my devices and Macs. There is one annoying detail though — I added these events on one of the Macs. After syncing, those events were duplicated on it. But that’s probably an early-days glitch and an Apple oversight. After adding a new event it appeared everywhere just once.

Documents are still unclear. The desktop iWork apps only offer to publish files to iWork.com, which is still in public beta.
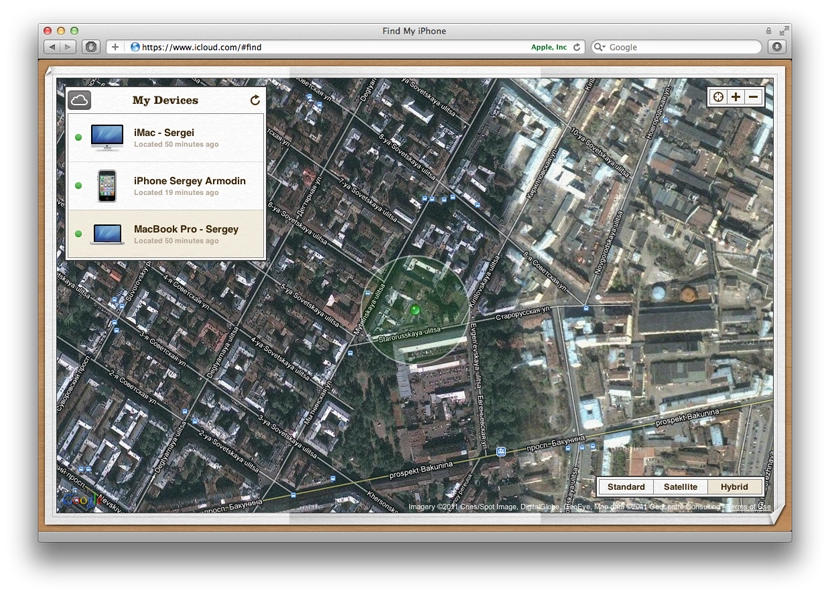
The «Find My Mac» feature lets you later track on iCloud.com where it is. As I understand it, this is for the case when it gets stolen, or you left it somewhere and don’t remember where.
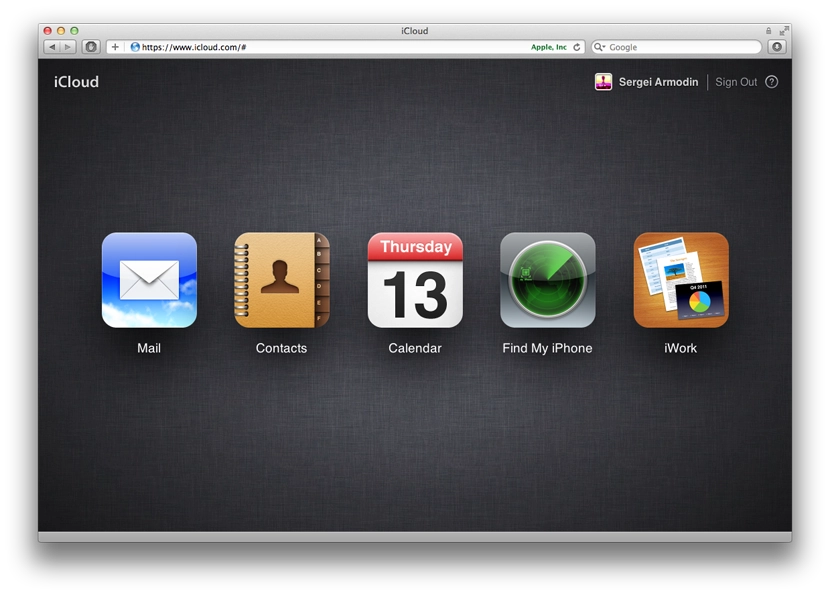
iCloud.com is now also open to everyone — styled in the spirit of iOS, offering 5 tools (or rather 4).


Mail should be a web interface similar to the standard Mail app. Contacts and Calendar look exactly like the standard Mac OS apps.


The Find My iPhone feature looks pretty entertaining — despite the name, it shows not only phones, but also Macs that have «Find My Mac» enabled.

You can send a message and a sound alert to the devices. It arrives instantly, and on top of that you get an email saying that such-and-such message was sent and delivered to the device. You can remotely lock the device or wipe it. For iPhone there’s even a toggle — when found, immediately email me. So the location is monitored somehow, without your involvement, it seems.

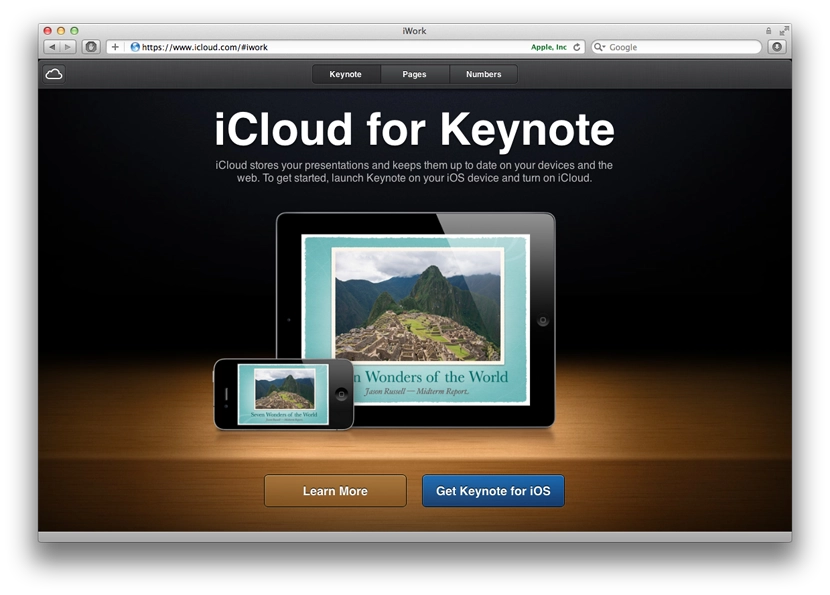
The iWork section currently contains only ads inviting you to install the iWork apps on your iOS devices. Apparently those already work with iCloud. None of the iWork apps are installed on my iOS devices — no need.
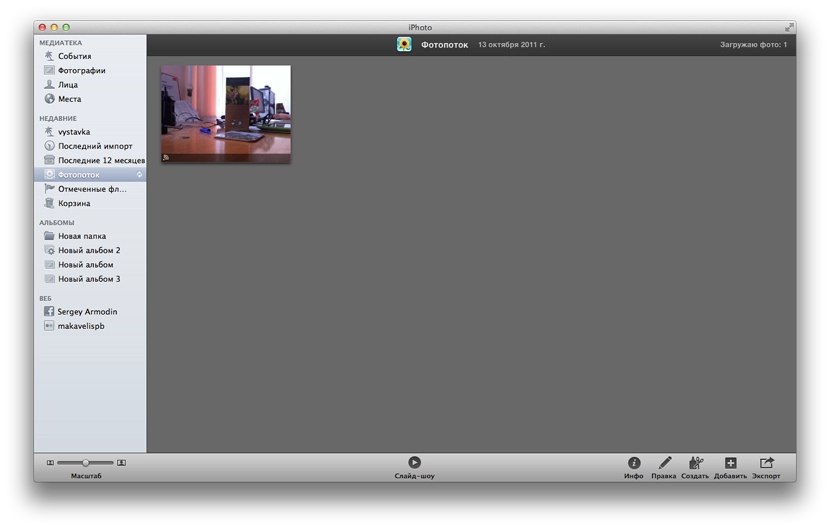
On an iOS device, in the iCloud settings you can turn on Photo Stream. From the moment you turn it on, all new photos start being uploaded to iCloud and become available on your other devices. Only new ones are uploaded — i.e. the ones taken after enabling the feature. Anything taken before — doesn’t go anywhere. Here’s how they look in iPhoto on the Mac:

You also need to enable Photo Stream in iPhoto. As soon as I took a photo on the iPhone (and opened the photos list), the photo started flowing into iCloud. It appeared in iPhoto automatically without any action from me.
The most puzzling feature for me so far is «Back to My Mac». Judging by the icon, it’s a way to connect to your Mac via remote desktop, but I haven’t found out how to actually do it. I really want to use this feature to connect to my home computer from work, since TeamViewer is getting on my nerves with its glitches and intrusive messages, opening its website and offering me a paid version.
Update: a description of how it works.
I didn’t enable Bookmarks in iCloud, since I barely use Safari. The bookmarks of the Opera I use are already synced through their built-in Opera Link service.
The cloud also stores backups of my iPhone, which have already eaten up almost half of the available free space. A useful thing if your computer suddenly dies. But somehow that doesn’t feel like a tragedy to me. The other syncs are also a kind of backup.
What I was looking forward to most was iTunes Match, but it won’t come for a while, and, alas, will only work in the US for now — like all the cloud music services, be it Amazon or Google. Sad — almost makes you want to write your own.
Such is this cloudy iCloud.
Working with JSON (parsing) in Objective-C for iOS
Another post — to help things settle in my own head. About working with JSON in Objective-C, using parsing of tweets from Twitter’s public timeline as an example.
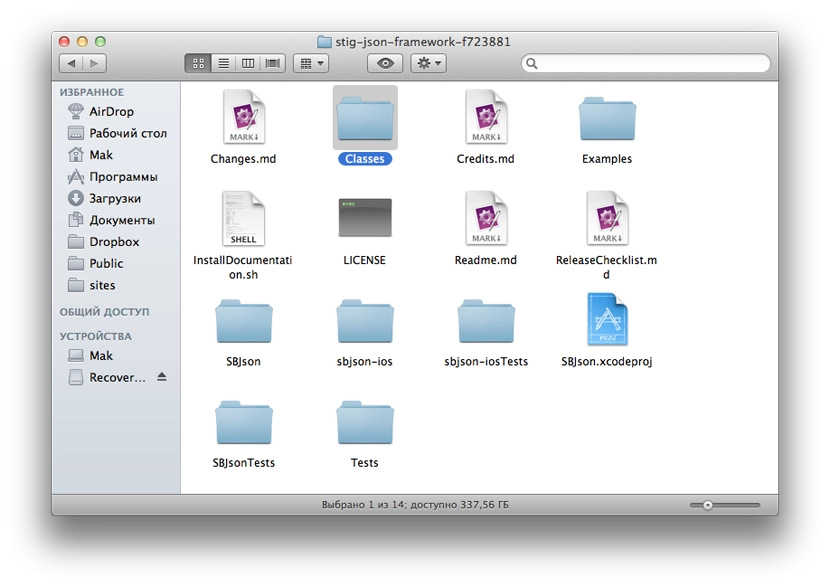
Out of the box Objective-C has nothing for working with data in JSON format. Only with XML. But there is a JSON framework, in case you’re forced into this by necessity / whim / your boss’s refusal to give you the data in XML (underline the relevant option). You can download it on GitHub. The latest version at the moment is 3.0.3. There’s also an alpha 3.1, but that’s an alpha.
The archive contains a Readme, examples, the framework itself, and some other files whose purpose is so far unknown to me :)

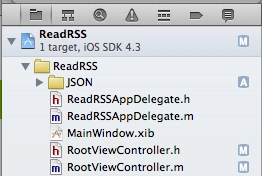
The framework files themselves live in the Classes folder, which is what you need to drag into the file list of your Xcode project. For convenience I renamed the folder to JSON after importing.

In RootViewController.h we import the framework with the line:
#import "SBJson.h"
In RootViewController.h we add the following code:
@interface RootViewController : UITableViewController {
NSMutableData *jsonData;
}
@property (nonatomic, retain) NSMutableData *jsonData;
@end
We declare a class property jsonData of type NSMutableData — that’s where we’ll stash the data returned by the request to the Twitter API.
The property line is needed in case we want to access the jsonData property from outside our class. nonatomic means that jsonData isn’t locked, i.e. we can both get and set the value. They write that nonatomic is faster than atomic. Atomic means we lock the value. About retain they say: How the setter method will set the variable. I haven’t fully figured out yet why this is needed and how to work with it, but without that line nothing works =).
We’ll grab JSON data from Twitter. Conveniently, the public timeline doesn’t require any auth or tokens — you just send a request to a particular URL, perfect for trying things out.
To start with — we have a class RootViewController. In RootViewController.m we’ll put the following code in viewDidLoad:
@synthesize jsonData;
- (void)viewDidLoad {
[super viewDidLoad];
// create an NSURL object with the address the request will go to
NSURL *url = [ NSURL URLWithString: @"http://twitter.com/statuses/public_timeline.json" ];
// create the NSURLRequest — the request itself
NSURLRequest *theRequest=[NSURLRequest requestWithURL:url
cachePolicy:NSURLRequestUseProtocolCachePolicy
timeoutInterval:60.0];
// start the connection
NSURLConnection *theConnection=[[NSURLConnection alloc] initWithRequest:theRequest delegate:self];
if (theConnection) {
self.jsonData = [NSMutableData data];
} else {
NSLog(@"Connection failed");
}
[theConnection release];
}
To handle the connection and the data, you also need to add this code:
/**
* As each new chunk of data arrives, append it to what we already have
**/
- (void)connection:(NSURLConnection *)connection didReceiveData:(NSData *)data {
[jsonData appendData:data];
}
/**
* If the connection fails — log the error to the console
**/
- (void)connection:(NSURLConnection *)connection didFailWithError:(NSError *)error {
NSLog(@"%@", error);
}
/**
* Once all data has arrived — parse it
**/
- (void)connectionDidFinishLoading:(NSURLConnection *)connection {
// store the received data into the result string
NSString *result = [[NSString alloc] initWithData:jsonData encoding:NSUTF8StringEncoding];
// we can log it to the console and inspect what we got
NSLog( @"%@",result );
// create the JSON parser object
SBJsonParser *jsonParser = [[SBJsonParser alloc] init];
// parse the result string into an NSArray
NSArray *dataObject = [jsonParser objectWithString:result error:nil];
// breakpoint can go here
// don’t forget to free the objects
[jsonParser release];
[result release];
}
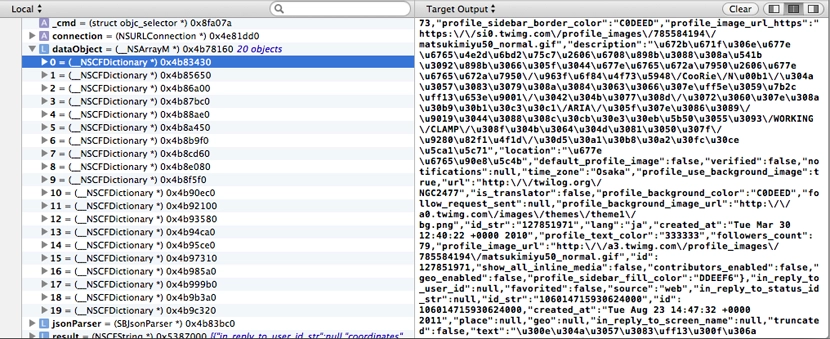
If you set a Breakpoint (CMD+\) at the spot indicated above (see «breakpoint can go here»), you can inspect the values at that point. The screenshot below shows that the string we received from Twitter was parsed into a dataObject of type NSArray, which contains 20 items inside it — i.e. data on 20 tweets from the public timeline.

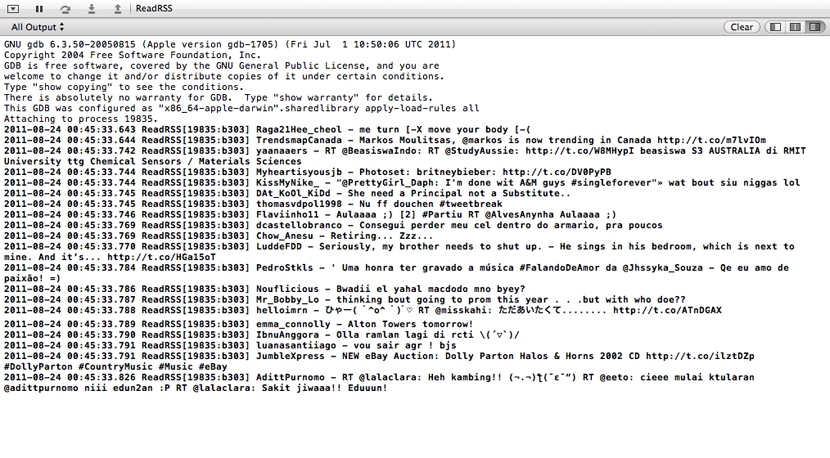
After the breakpoint line, the received data can already be processed somehow. For example, you can log the received tweets to the console as «Username — TweetText»:
for ( NSDictionary *tweet in dataObject ) {
NSLog(@"%@ - %@", [[tweet objectForKey:@"user"] objectForKey:@"screen_name"], [tweet objectForKey:@"text"] );
}

Hopefully I haven’t lied or got anything wrong anywhere. Corrections / clarifications very welcome.
Recap of Apple Developers Community #7 meetup
Went to Apple Developers Community #7 today. The talks were about marketing iOS apps. Two people effectively presented — a representative from Nevosoft, who seem to crank out games on a conveyor belt, and one indie developer.
It was pretty boring. What they said could have been said much faster. The woman from Nevosoft was asked silly questions for ages. As always, there were a couple of know-it-alls in the room itching to demonstrate how clever they were.
Not that there were any revelations, but a lot of things, until someone says them out loud, don’t feel important and don’t stay in your focus.
Key takeaways. The app icon is very important. Insanely important (I’m not being sarcastic) — the first thing the user sees is the icon in the listing. It should be bright; the advice was to take a screenshot of the App Store, drop your icon into it, and check whether it stands out and catches the eye. Plus look at how it looks on the iPhone home screen among other apps — the user should be able to spot it visually quickly.

The second thing the user sees is the app screenshots. How they look matters too — they need attention. If they don’t hook the user, they won’t install your app even if it’s free (from my own experience — agreed). The view was that doing plain app screenshots isn’t always worth it — they look much more appealing if presented somehow, e.g. composited inside an iPhone mock-up. Apple doesn’t require screenshots to be strictly app screenshots, and many people exploit this, building entire collages.


On launch day you get a head start by appearing in the «New» list within your category. So later sales/downloads largely depend on the first day.
Then they talked about the description and choosing keywords. People usually try to pick keywords cleverly so that fewer competitors show up for them and you get noticed. It’s a double-edged sword — you can find a word for which you’re alone, but no one would think to type it. The indie developer claimed that if a keyword appears both in your app name and in the keyword list, you rank higher. That’s his personal experience.
Worth investing in the description too — if people read it at all, they read at most the first lines. Walls of text discourage further reading (again, agreed from experience).
Apple requires apps to have a website / web page. It’s a mandatory condition so users have a way to give feedback to the developer. And again — to a degree it generates user flow.
Then they discussed various ad networks, click-throughs, and the pros and cons of Full and Lite versions — also a double-edged sword. On one hand, Lite drives traffic to the Full version. On the other, promoting two apps is harder than one.
The indie developer said you have to polish everything — do every possible localisation (he commissioned translations into European and Asian languages), and each new localisation brought him a percentage of new users. Work properly on press releases, especially in other languages, even outsourcing them to specialists for proofreading.
And, most importantly — the app shouldn’t be crap, but that one’s obvious.